 Save
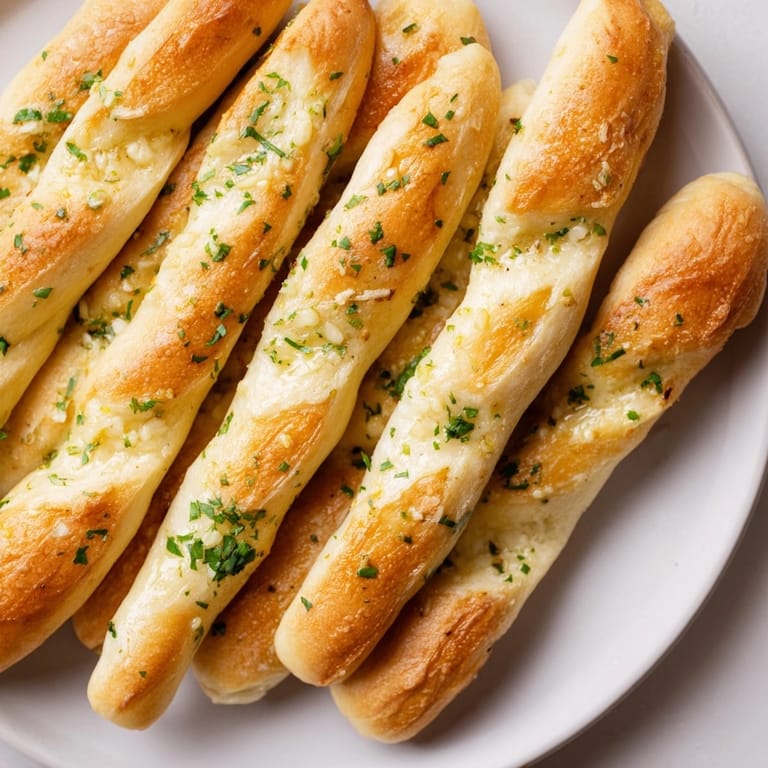
Save These soft garlic onion breadsticks fill the kitchen with the best savory aroma and always disappear in minutes at gatherings. Breezy to prepare and bursting with buttery flavor, they make any dinner feel a little more special whether you are serving pasta or just need something warm to dip in sauce.
This recipe won me over the first time I brought a batch along to a potluck. My friends lined up for seconds and a couple even wrapped up leftover breadsticks to take home. Now it is my go-to for homemade comfort food with minimal fuss.
Ingredients
- Active dry yeast: gives the breadsticks their signature rise look for fresh yeast that has not passed its expiration date for best results
- Warm water: activates the yeast and helps bring the dough together aim for water that is about the temperature of a warm bath
- Granulated sugar: helps wake up the yeast and brings a hint of light sweetness to the dough
- All-purpose flour: forms the backbone of the breadsticks choose unbleached for the best texture and avoid flour with lumps or an odd odor
- Salt: seasons the dough and the butter topping making every bite pop
- Olive oil: adds moisture and flavor use a good quality extra virgin olive oil for richness
- Unsalted butter: becomes the base for the garlic-onion topping always melt it gently so it mixes easily with aromatics
- Fresh garlic: brings a bold fragrant flavor to the breadsticks choose plump firm cloves without green shoots
- Finely minced onion: adds sweetness and a gentle bite yellow onions work perfectly here chop them finely for even distribution
- Fresh parsley: is optional but brightens the topping with color and freshness flat-leaf has the best flavor but curly will do in a pinch
- Extra salt: in the butter topping draws out more flavor so do not skip this finishing touch
Tired of Takeout? 🥡
Get 10 meals you can make faster than delivery arrives. Seriously.
One email. No spam. Unsubscribe anytime.
Instructions
- Prepare the Yeast:
- In a large bowl combine the warm water and sugar then sprinkle in the yeast Stir just to mix and let it stand for about five minutes until the surface looks foamy and creamy This is how you know the yeast is alive and active
- Make the Dough:
- Add the flour salt and olive oil to the yeast mixture Mix with a sturdy spoon or dough hook until a rough dough forms It will be a little sticky but should hold together
- Knead the Dough:
- Turn the dough onto a lightly floured surface and knead by hand for about five to seven minutes Press and fold the dough with the heel of your hand until it turns smooth and elastic When you press it lightly it should spring back
- First Rise:
- Place the kneaded dough in a clean bowl wiped with olive oil Roll it to coat all sides then cover with a towel or plastic wrap Let it rise in a warm spot for about an hour until it has doubled in size A gentle poke should leave an indentation
- Shape Breadsticks:
- Punch down the risen dough gently to release extra air Divide it into twelve roughly equal pieces Roll each one into a skinny rope about seven inches long Try to keep them close to the same size so they bake evenly
- Arrange on Baking Sheet:
- Line a baking sheet with parchment paper and place the breadsticks a little apart so they have room to puff up
- Mix Garlic-Onion Butter:
- In a small bowl combine melted butter minced garlic finely chopped onion parsley if using and salt Stir well so the flavorings spread evenly
- Brush Before Baking:
- Use a pastry brush to generously coat the shaped breadsticks with half of the garlic-onion butter Make sure every part is covered for the best flavor
- Bake:
- Slide the pan into a preheated oven at four hundred degrees Fahrenheit Bake for thirteen to fifteen minutes until the breadsticks are golden brown and fragrant
- Finish with More Butter:
- When the breadsticks come out of the oven immediately brush on the remaining garlic-onion butter The heat helps all that savory flavor soak in
- Serve Warm:
- Enjoy the breadsticks while still hot and soft from the oven They shine on their own or dipped in your favorite sauce
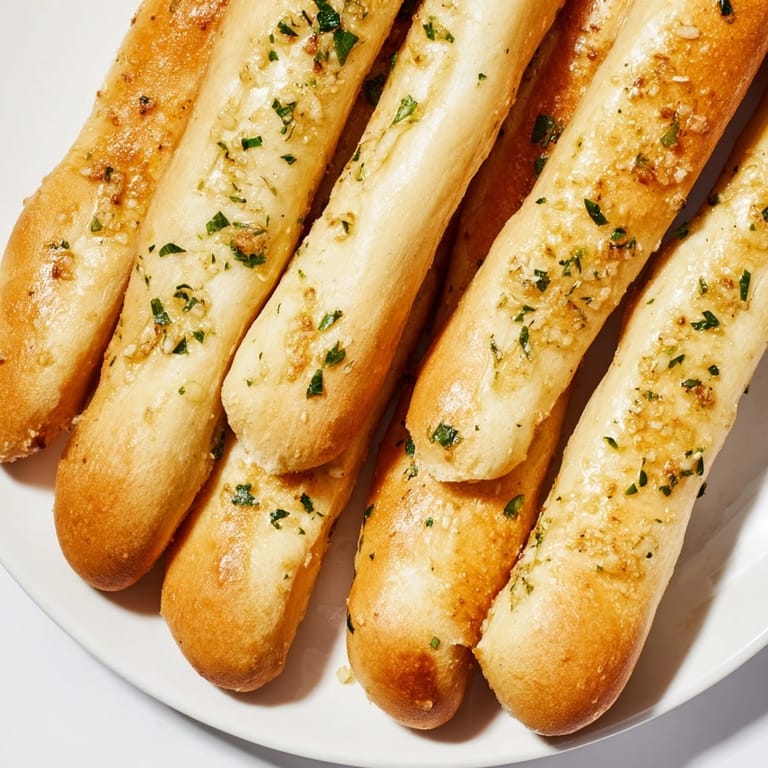 Save
Save I have always loved the punch of fresh garlic in these breadsticks It feels like the one ingredient that transforms simple dough into something crave-worthy There are memories of my kids helping knead the dough laughing at flour clouds everywhere and waiting impatiently near the oven for the first batch to finish
Storage and Make-Ahead Tips
These breadsticks store well at room temperature for up to two days Just keep them in an airtight bag to prevent drying out For longer storage tuck them in the freezer wrapped tightly and warm up in a three hundred fifty degree oven until soft again The butter topping stays flavorful after freezing too
Ingredient Swaps and Add-ins
This recipe handles changes like a champ Swap onions for finely chopped chives or scallions if you prefer Instead of butter try your favorite plant-based alternative for a vegan version I also like adding a dusting of grated Parmesan on top before baking for a richer finish
Perfect Pairings
Serve with marinara sauce for dipping alongside salads or as an appetizer to any Italian meal Sometimes I make a double batch and tuck the extras into lunches or pack them for picnics Warm breadsticks are always a hit with a bowl of tomato soup too
A Little History
Breadsticks also called grissini hail from northern Italy but this soft variation has its roots in Italian-American kitchens where garlic and butter rule Adding onion gives the classic a gentle twist and turns these breadsticks into something all their own
Seasonal Adaptations
Replace parsley with basil or rosemary for a summery burst Use roasted garlic instead of raw for a milder flavor Shape into twists for a festive look during holidays
Success Stories
I have heard from friends who turned these into a family pizza night tradition Others like to tuck them into dinner party baskets and let everyone reach for their favorite The soft dough and savory topping never disappoint
Freezer Meal Conversion
To freeze after baking cool breadsticks completely then wrap in foil and store in a zip bag They reheat perfectly and do not lose their softness When you want one just warm it up wrapped in foil for about ten minutes and brush with a little butter to refresh
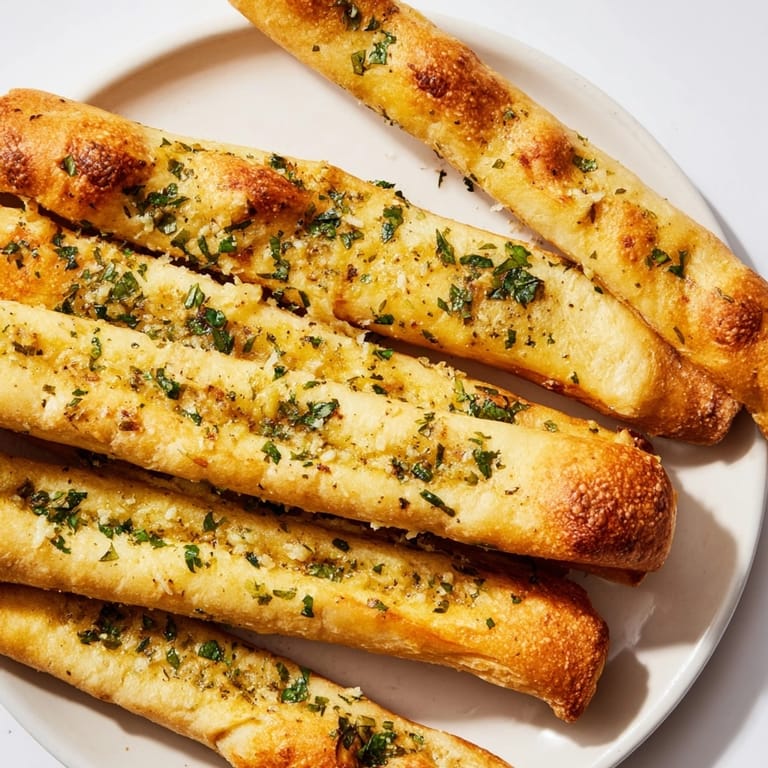 Save
Save Serve these breadsticks while hot and fragrant for an irresistibly cozy finish. Their soft crumb and savory topping guarantee they will vanish fast.
Recipe FAQ
- → How can I ensure the breadsticks are soft inside?
Let the dough rise until doubled and avoid overbaking; brushing with butter helps maintain tenderness.
- → Can I substitute dried parsley for fresh?
Yes, dried parsley works well if fresh is unavailable; use about one-third the amount for similar flavor.
- → Are these breadsticks suitable for freezing?
Absolutely. After baking, cool and freeze them. Reheat in a 350°F oven for fresh taste.
- → What’s the best way to serve the breadsticks?
Serve warm, straight from the oven. They pair excellently with soups, salads, or pasta.
- → How can I add more flavor?
Sprinkle grated Parmesan or use flavored butter for extra richness and depth in taste.
- → Is this suitable for vegetarians?
Yes, all ingredients listed are vegetarian-friendly, provided dairy is acceptable in the diet.