 Save
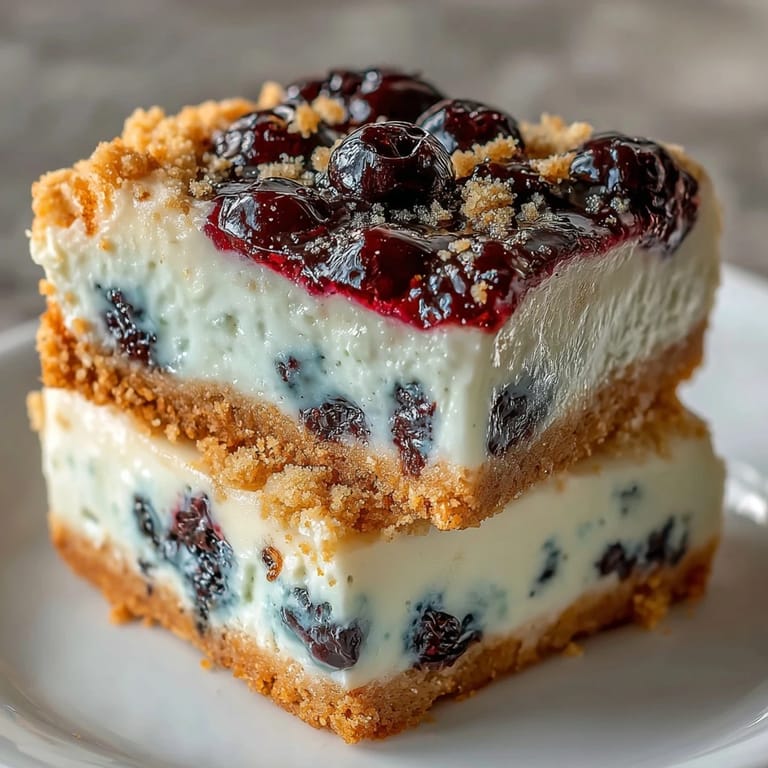
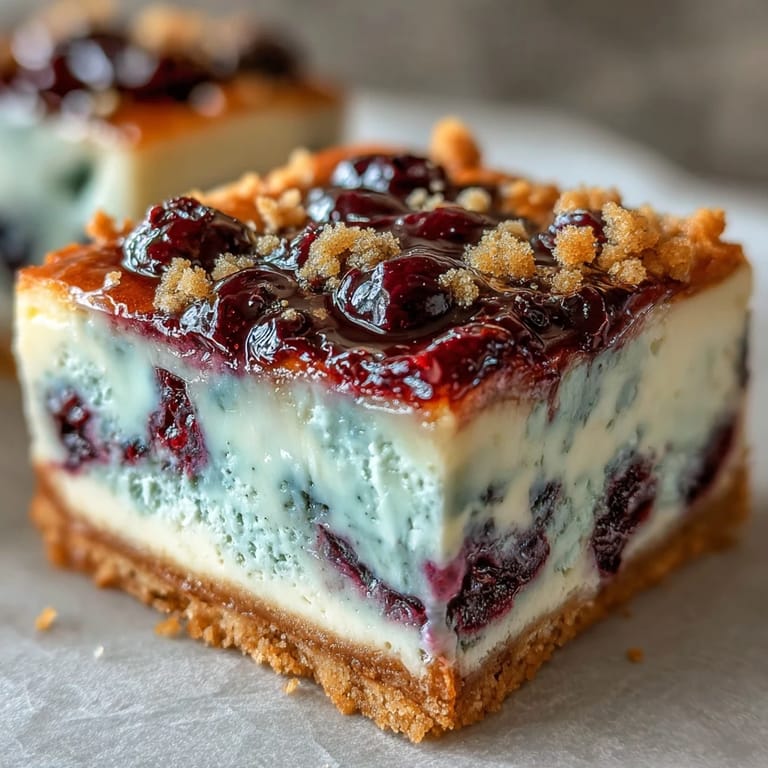
Save The first time I made these no-bake lemon blueberry cheesecake bars, the kitchen filled with the scent of citrus before I even finished zesting the lemons. The quiet whirr of the mixer was punctuated by the sizzle of blueberries simmering, and the anticipation was enough to make me check on the setting bars more times than I care to admit. There’s a certain kind of delight in not having to turn on the oven, especially during the sticky heat of late spring. Making them felt more like play than work, swirling those bright purple streaks through the cloudlike cheesecake. Somehow, they taste even brighter when the sun is streaming through the window.
I remember bringing these cheesecake bars to a picnic in the park, barely managing to keep them chilled in the cooler as friends laughed and reached for just one more piece. Everyone wanted to know what made them taste so light—even after a whole spread of sandwiches and snacks, there was room for a bar or two. They disappeared faster than I expected, with only blueberry-stained napkins as evidence. That slight zing from the lemon somehow matched the bright, carefree chatter that afternoon. It felt like a gentle celebration of sunshine and simplicity.
Ingredients
- Graham crackers or digestive biscuits: They give the crust its crisp, buttery bite—a few firms taps with a rolling pin and you’ll have the right crumb.
- Unsalted butter: Melted and mixed into the base so the crust sets firm, and it’s worth letting it cool just enough to avoid sogginess.
- Granulated sugar: A sprinkle in both the crust and blueberry swirl brings subtle sweetness without overpowering tangy notes.
- Cream cheese: Room temperature cream cheese makes for a smoother, lump-free filling I never skip the softening step.
- Powdered sugar: Its ultra-fine texture blends seamlessly, ensuring every bite stays delicately sweet and creamy.
- Heavy cream: Whipped to stiff peaks, this secret folding step gives the bars their luxurious, fluffy lift.
- Lemon juice and zest: Fresh is non-negotiable—a microplane makes zesting quick and keeps all the oils where you want them.
- Pure vanilla extract: Just a splash rounds out the flavors, letting the fruit and lemon really sing.
- Blueberries: Fresh or frozen both work, so long as you let frozen berries thaw a bit for an even swirl.
- Cornstarch slurry: Just a spoonful helps thicken the blueberry swirl without any floury taste.
Tired of Takeout? 🥡
Get 10 meals you can make faster than delivery arrives. Seriously.
One email. No spam. Unsubscribe anytime.
Instructions
- Prep the pan:
- Line your square baking pan with parchment, making sure the edges hang over—this little trick saves so much hassle when it’s time to slice and lift.
- Build the crust:
- Mix crushed biscuits, melted butter, and sugar in a bowl until the mixture feels like wet sand then press it firmly into the pan so it becomes an even, compact layer—your hands work just as well as any spatula.
- Make the blueberry swirl:
- Simmer the blueberries, sugar, and lemon juice until they bubble and the berries gently burst, perfuming the air; add the cornstarch mixture, stir until glossy, and cool completely before swirling.
- Prepare the cheesecake mixture:
- Beat cream cheese with powdered sugar until no lumps remain, then blend in the lemon juice, zest, and vanilla for a tangy base that’s impossibly smooth.
- Whip and fold:
- Whip heavy cream to stiff peaks—it should stand tall on the whisk—then gently fold it into the cream cheese mixture without deflating that dreamy fluffiness.
- Combine and swirl:
- Spread the creamy filling over your chilled crust, dot with blueberry sauce, and use a skewer or knife to create marbled violets and golds—but don’t overdo it or you’ll lose the swirls.
- Chill to set:
- Cover and refrigerate for at least four hours, resisting the urge to peek; this is when the bars firm up to sliceable perfection.
- Slice and serve:
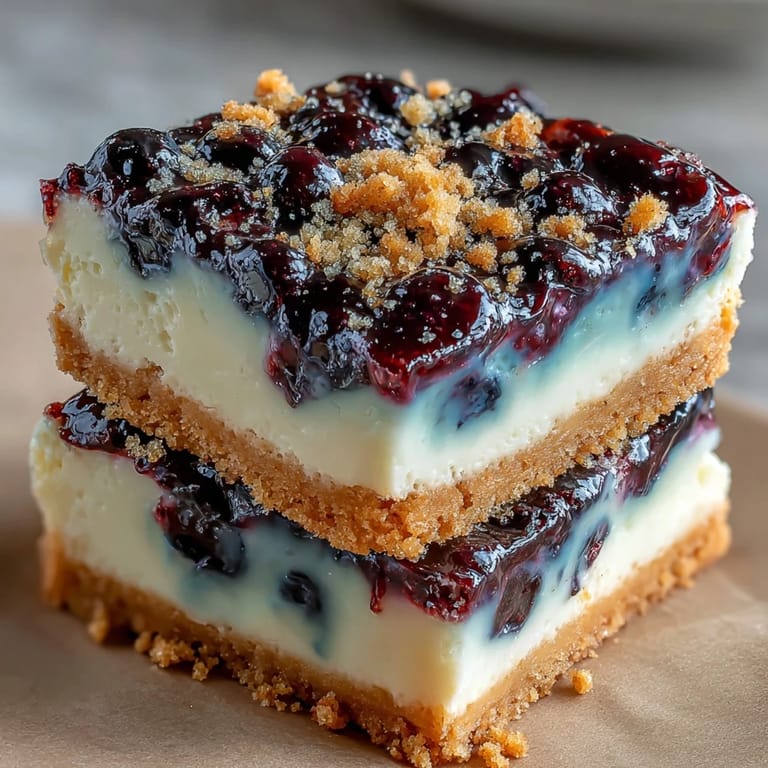
- Lift from the pan using the parchment, cut into neat squares, and serve cold, perhaps with a sprinkle of fresh lemon zest or a couple of whole blueberries on top.
 Save
Save One afternoon, we ended up eating these cheesecake bars sitting on the stoop because the kitchen was too warm, and someone remarked they tasted like summer on a plate. It was the kind of candid, offhand compliment that sticks with you. Surrounded by good company and sticky fingers, these bars somehow became a little ritual for our get-togethers. From then on, they weren’t just dessert—they were a reason to gather. Their simplicity was part of their magic.
Working With Blueberries
Fresh blueberries are my first pick for their bright pop, but frozen ones are a reliable stand-in, especially when out of season. If frozen, just let them thaw a little so the juices thicken more quickly with the cornstarch. Don’t shy away from the lemons either—the tang highlights the berries even more. Getting the swirl right is easier than it looks, and a haphazard approach tends to look just as lovely as a meticulous one. Blueberry bits will stain your fingers, so keep a damp cloth nearby if you’re aiming for picture-perfect bars.
Getting the Creamiest Texture
Softening the cream cheese and careful folding of the whipped cream are key for that impossibly airy filling. It’s tempting to rush, but gentle turns and patience make all the difference. Beware of overmixing or you’ll lose the dreamy loft you worked for. If you forget to chill your bowl and beaters before whipping cream, tuck them in the freezer for a few minutes for extra insurance. That little step guarantees clouds, not clumps, in your cheesecake layer.
Serving and Storing Made Simple
If you want clean slices, wipe your knife with a warm, damp cloth between each cut—it’s a tiny detail but it looks pro. These bars keep beautifully chilled and can be made up to two days ahead, which frees you up to actually enjoy your gathering. Try adding a scattering of fresh berries or edible flowers on top for a showstopper finish.
- If you use parchment with a generous overhang, lifting the bars out is a breeze.
- Gluten-free biscuits make these suitable for more friends—no one’s left out.
- Always allow bars to chill the full time so every layer sets just right.
 Save
Save Hope these bars brighten up your next gathering as much as they do mine—you might just find yourself making them on repeat. Enjoy every swirly, creamy bite!