 Save
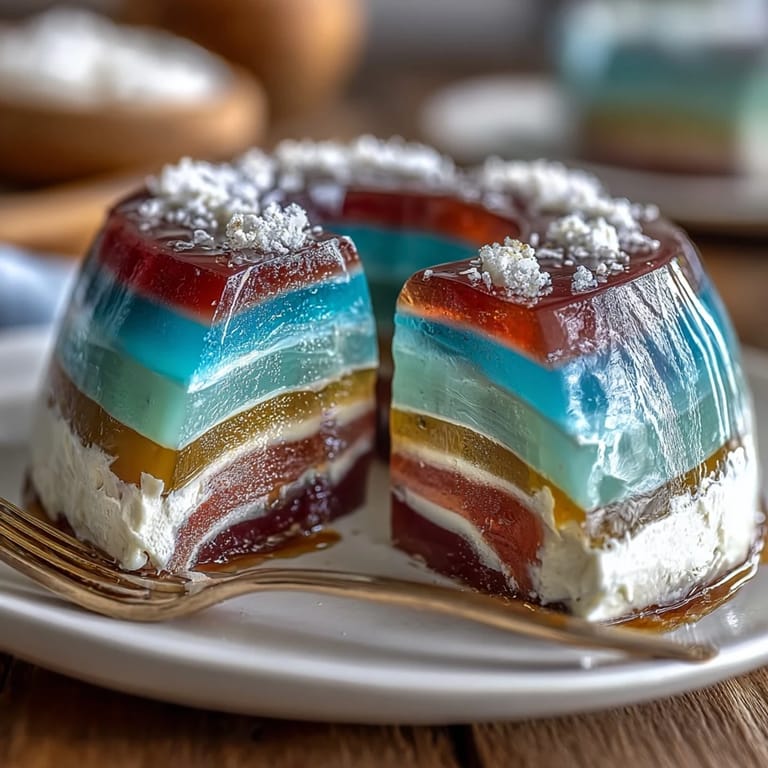
Save The first time I made a Rainbow Jelly Cake, I was captivated by the endless possibilities of color swirling through the kitchen. The quiet fizz of simmering agar-agar alongside the hum of an early summer evening felt like an invitation to unwind. Watching vibrant layers take shape one by one became oddly meditative—a little escape into the world of edible art. A drizzle of coconut cream capped the moment, cooling the air and setting the stage for a dessert that's as much fun to create as it is to eat.
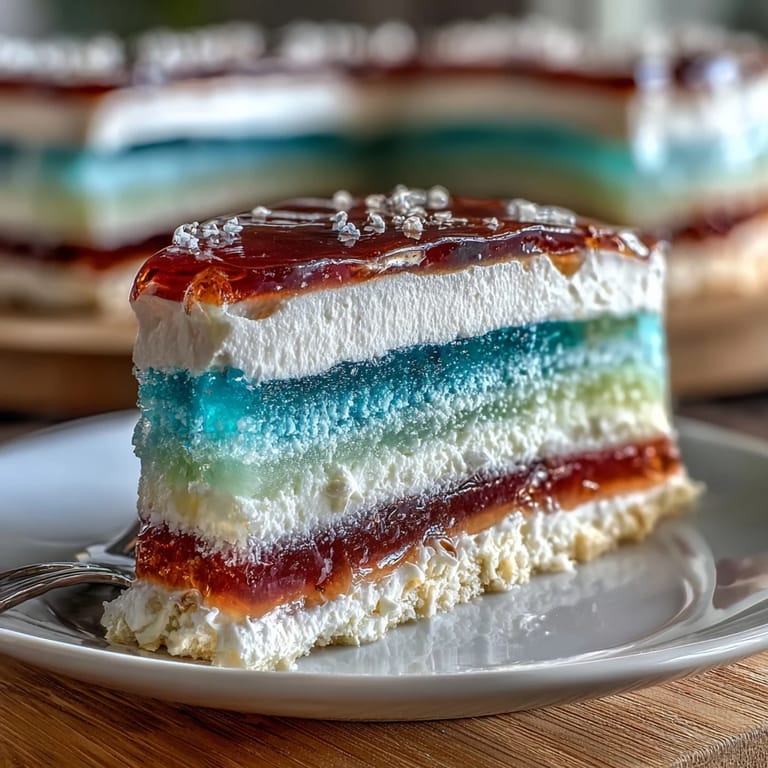
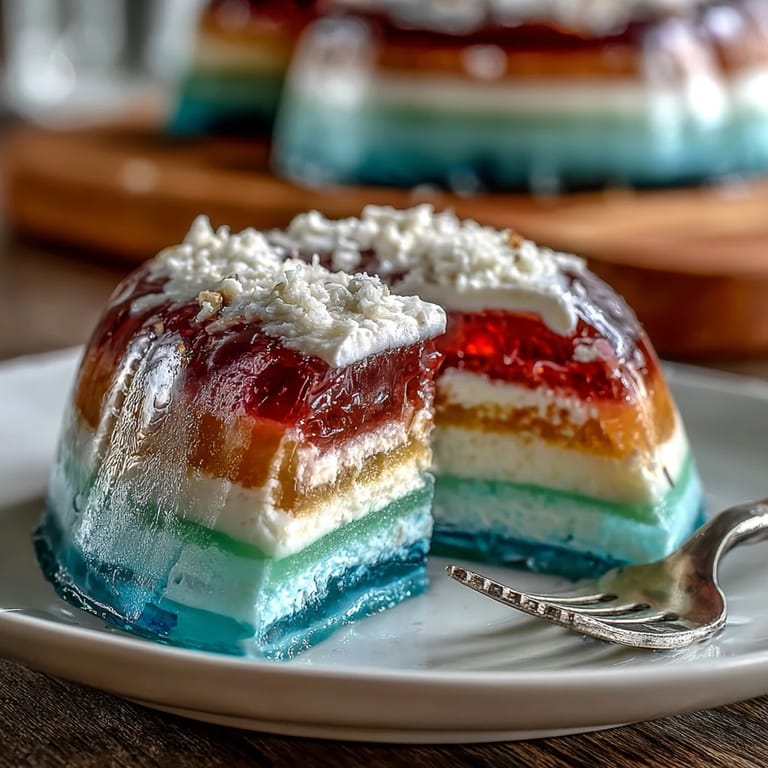
When I finally unveiled this jelly cake to my friends on a humid afternoon, someone gasped and asked if I’d painted each layer by hand. I laughed, realizing the sheer delight of sharing a dessert that looks far trickier than it actually is. Conversations tumbled over the table as everyone admired their kaleidoscopic slices, debating which color tasted best (spoiler: all of them have that gentle vanilla sweetness with a creamy coconut finale).
Ingredients
- Agar-agar powder: This magical plant-based setting agent is the secret to those clean, bouncy layers — always dissolve it thoroughly before adding sugar.
- Water: Used both for dissolving agar-agar and thinning coconut cream, filtered water gives the jelly an especially clean sheen.
- Granulated sugar: The sweetness ties the layers together; I learned you can adjust it for a less sugary bite, but don’t skip it entirely.
- Food colorings (red, orange, yellow, green, blue, purple): The heart of the rainbow; go bold for drama or pastel for daytime parties. Natural colorings work but can be subtler.
- Vanilla extract (optional): Adds a warm, fragrant depth—skip it if you prefer pure coconut aroma.
- Coconut cream: Silky and lush, coconut cream brings a tropical finish that contrasts beautifully with the jelly’s bounce.
- Pinch of salt: Just a dash keeps sweetness in check and makes the coconut flavor pop.
Tired of Takeout? 🥡
Get 10 meals you can make faster than delivery arrives. Seriously.
One email. No spam. Unsubscribe anytime.
Instructions
- Create the Jelly Base:
- Combine agar-agar powder and water in a medium saucepan, then bring it to a lively simmer while stirring steadily; the gentle swish becomes silkier as the agar-agar dissolves and the kitchen gets that sweet, toasty aroma.
- Tint the Rainbow:
- Divide the clear, fragrant jelly mixture into six bowls—carefully stir in your food coloring to reveal a palette of vivid hues, one per bowl.
- Layer Like a Pro:
- Pour the first color into a 20 cm mold, let it set until just wobbly but no longer liquid (about 5–8 minutes), and continue layering each color with patience and a steady hand—pausing for each stratum to set before pouring the next.
- Stir Up Coconut Cream:
- In a fresh saucepan, whisk together coconut cream, water, and agar-agar over gentle heat until smooth; add sugar and a pinch of salt, stirring until your spoon draws silky trails.
- Marry the Layers:
- Once the purple jelly has set but is still tacky, slowly pour the warm coconut mixture atop the rainbow—pouring too hot or too fast risks rippling the layers.
- Chill for the Magic:
- Allow the cake to cool to room temp, then refrigerate for at least an hour until everything holds together like a prism.
- Reveal and Serve:
- Gently loosen the edges with a spatula or knife, invert onto a plate, and slice into jewel-toned servings for the ultimate grand reveal.
 Save
Save  Save
Save One birthday, my niece declared this her “unicorn dream cake”—watching her eyes widen at the first technicolor slice made all the fussing with layers worth it. That moment reminded me that sometimes the simplest ingredients, stacked with care, really can turn dessert into pure magic.
Making It Your Own
After several experiments, I discovered that swapping a splash of rose or pandan for the vanilla made each layer sing in a different key. Swirling two or three colors together on a few layers turns out whimsical marbled slices that spark conversation without any extra effort.
Troubleshooting and Texture Secrets
If your jelly feels a little too firm, don’t hesitate to cut back very slightly on agar-agar next time—every brand and climate acts just a bit differently, and a little less sets softer without losing those crisp layers. If bubbles appear, try gently skimming the surface before each pour for picture-perfect layers beneath the coconut veil.
Serving and Storing Like a Pro
I always slice with a knife run under hot water, wiping between cuts for pristine lines. Serve on a chilled platter for the ultimate cool-down treat at gatherings.
- If you’re short on time, smaller molds speed up the setting.
- Cover leftovers tightly to keep flavors fresh for up to three days.
- Let the cake sit at room temp for five minutes before slicing for the best texture.
 Save
Save  Save
Save This rainbow jelly cake has a knack for turning any table into a celebration—no baking, just color, shimmer, and happy anticipation.
Recipe FAQ
- → Can I substitute agar-agar with gelatin?
Agar-agar sets firmer and at room temperature, while gelatin yields a softer, more delicate gel and requires refrigeration to hold. Use gelatin only if not restricting animal-derived ingredients; adjust quantities and cooling times accordingly.
- → How long should each colored layer set before adding the next?
Let each layer cool for about 5–8 minutes until just set but still tacky on top. This helps layers adhere without bleeding while avoiding long delays between pours.
- → Any tips for pouring even layers?
Use a measuring cup or ladle for consistent volume per layer and tilt the mold slightly if needed. Pour gently down the side or over a spatula to avoid disturbing the previous layer.
- → How long does the finished cake keep in the fridge?
Cover and refrigerate for up to 3 days. Keep it in an airtight container or wrapped to prevent odor absorption and to maintain a glossy surface.
- → Can I make this fully vegan?
Yes—agar-agar and coconut cream are plant-based. Confirm that sugar and any colorings are vegan-certified to ensure the whole dish remains free of animal-derived ingredients.
- → How can I avoid color bleeding between layers?
Allow each layer to reach a just-set state before pouring the next and make sure the next batch is not too hot; warm (not boiling) liquid reduces melting of the previous layer's surface.