 Save
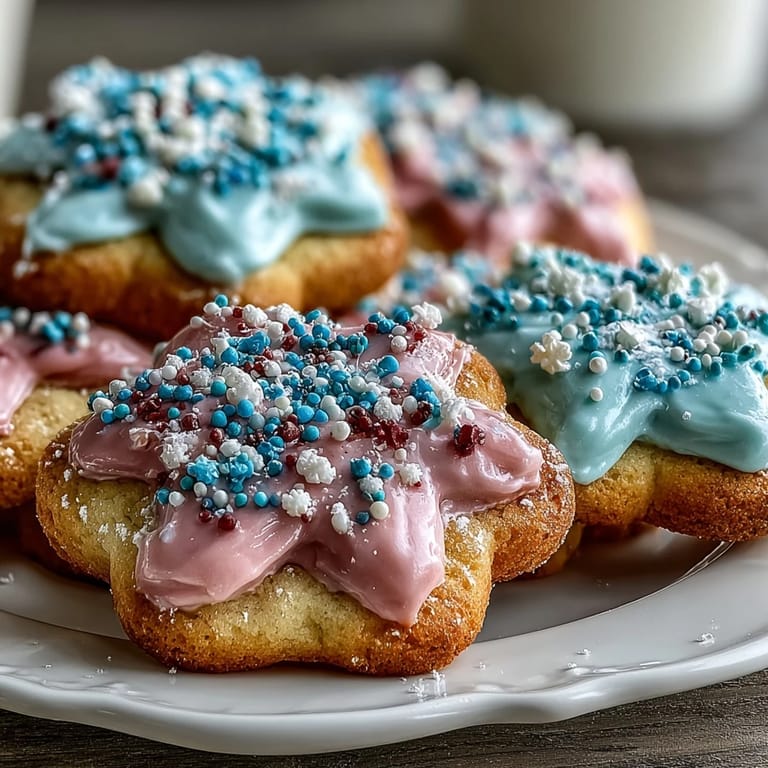
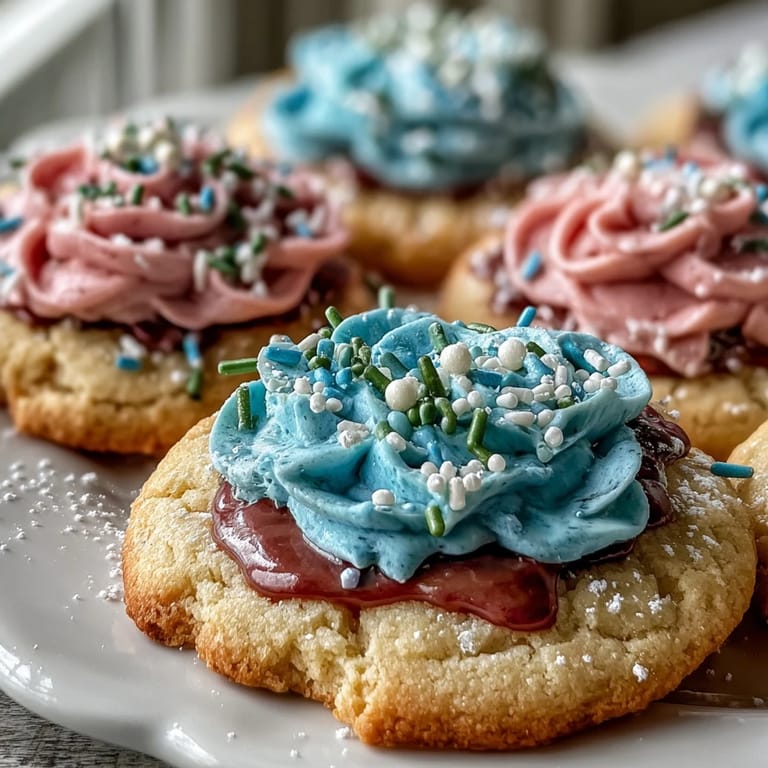
Save My sister called me in a panic three days before her baby shower, wondering if I could whip up something prettier than store-bought cookies. I'd never made flower-shaped cookies before, but something about the idea of delicate pastel blooms felt right for celebrating a new little one. That afternoon, my kitchen filled with the smell of butter and vanilla, and by evening, I was piping soft icing onto cooling cookies, each one looking like it belonged in a spring garden. The whole process felt less like baking and more like creating tiny edible bouquets, and watching my sister's face light up when she saw them made every minute worthwhile.
I'll never forget watching my mom's friends gathered around the dessert table at that baby shower, picking up cookies as carefully as if they were handling actual flowers. Someone said, "These are almost too pretty to eat," which made us all laugh because then everyone promptly ate three more. That's when I realized these cookies do something special—they transform a simple dessert into a moment of delight, the kind of detail that people remember long after the celebration ends.
Ingredients
- All-purpose flour (2 1/2 cups): The backbone of your dough, giving structure without being heavy—make sure to spoon and level it rather than scooping straight from the bag, which packs it down.
- Unsalted butter (3/4 cup, softened): This is your flavor foundation, so use good quality butter and let it sit on the counter until it's genuinely soft enough to leave a fingerprint.
- Granulated sugar (3/4 cup): Creaming this with butter until fluffy incorporates air that keeps cookies tender and delicate.
- Large egg: Binds everything together while adding richness; room temperature eggs mix in more smoothly than cold ones.
- Pure vanilla extract (2 teaspoons): The gentle perfume that makes people pause and ask what smells so good.
- Baking powder (1/2 teaspoon): Just enough lift to keep cookies from being dense, without making them cakey.
- Salt (1/4 teaspoon): A small amount that enhances vanilla and butter flavors you didn't even know were there.
- Powdered sugar (3 cups, sifted): Sifting removes lumps that would streak your icing and ruin that smooth, glossy finish.
- Meringue powder (2 tablespoons): The secret to royal icing that dries hard and shiny; it stabilizes the mixture so it holds its shape when piped.
- Water (4–5 tablespoons): Add slowly and taste as you go—the consistency should be like thick yogurt, spreadable but still holding peaks.
- Pastel food coloring gels (pink, yellow, green, blue, lavender): Gel colors won't thin your icing like liquid ones do, and they give you those soft, sophisticated pastels instead of candy-bright hues.
Tired of Takeout? 🥡
Get 10 meals you can make faster than delivery arrives. Seriously.
One email. No spam. Unsubscribe anytime.
Instructions
- Whisk the dry ingredients:
- In a medium bowl, combine flour, baking powder, and salt, then set aside—this step ensures even distribution of the leavening agent so your cookies rise consistently.
- Cream butter and sugar:
- Beat them together for a full 2–3 minutes until the mixture looks pale, fluffy, and noticeably lighter in color, which means you've incorporated enough air. Stop occasionally to scrape down the bowl.
- Incorporate egg and vanilla:
- Add these wet ingredients and mix until they disappear into the butter mixture, scraping down the sides as needed.
- Combine wet and dry:
- Add the flour mixture in two additions, mixing on low speed just until no streaks of flour remain—overworking toughens the dough. The dough will be soft but manageable.
- Chill the dough:
- Divide the dough in half, flatten each piece into a disc, wrap tightly in plastic wrap, and refrigerate for at least 1 hour so it firms up enough to roll without sticking. If you're in a rush, 45 minutes in the freezer works in a pinch.
- Preheat and prepare:
- Heat your oven to 350°F (175°C) and line two baking sheets with parchment paper, which prevents sticking and ensures even browning on the bottoms.
- Roll and cut:
- Working with one dough disc at a time, lightly flour your surface and roll the dough to exactly 1/4-inch thickness—any thinner and the cookies get fragile, any thicker and they won't bake evenly. Cut as many flower shapes as possible, then gather the scraps, chill them briefly if needed, and reroll.
- Space and bake:
- Arrange cookies 1 inch apart on your prepared sheets, as they'll spread slightly, and bake for 10–12 minutes until the edges are just barely golden and the centers still look slightly underbaked. They'll continue cooking on the hot pan.
- Cool properly:
- Leave cookies on the baking sheet for 5 minutes so they firm up enough to move without breaking, then transfer them to a wire rack to cool completely before icing.
- Make the royal icing:
- Sift powdered sugar and meringue powder together, then add water one tablespoon at a time, stirring constantly until the icing reaches the consistency of thick yogurt—spreadable but still holding soft peaks. If it gets too thin, add more powdered sugar a teaspoon at a time.
- Tint and decorate:
- Divide the icing among small bowls and add pastel gel color one tiny drop at a time, stirring well between additions, since these colors concentrate quickly. Spread or pipe the icing onto completely cooled cookies, creating delicate patterns that feel like painting edible flowers.
- Set and serve:
- Allow the icing to harden completely—usually 2–4 hours depending on humidity—before stacking or packaging the cookies so the icing doesn't smudge.
 Save
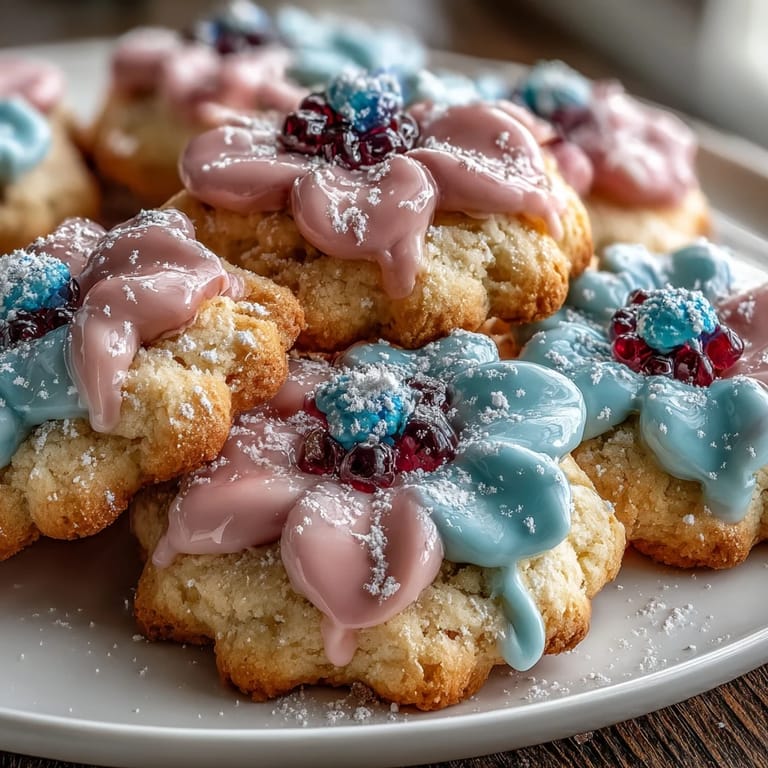
Save One afternoon while decorating cookies for a friend's gender reveal, I realized I'd made them in her nursery's exact color palette—soft sage, dusty pink, pale yellow—without planning it that way. She cried a little, which made me understand that sometimes the smallest, most thoughtful touches become the memories people actually hold onto.
The Icing Secret Nobody Talks About
The difference between icing that looks homemade and icing that looks professional comes down to one thing: patience. Don't rush to decorate while the icing is still too thin, and don't try to spread it on warm cookies because it'll melt and run everywhere. A friend once showed me a trick of letting the icing sit for five minutes after mixing, which helps it set the right consistency almost magically, and now I swear by it every time.
Flavor Riffs Worth Trying
The vanilla-butter base is forgiving enough that you can play with it without losing the delicate charm. Adding a drop of almond extract whispers something subtle into the background, while a faint hint of lemon zest in the dough makes the whole thing feel brighter and more spring-like. Some bakers add a touch of rose water to the icing itself, which sounds fancy but actually just adds a whisper of something floral that makes people pause mid-bite and wonder what they're tasting.
Timing and Storage Wisdom
These cookies are happiest when made the day of or the day before decorating, because the longer they sit after baking, the more they absorb moisture from the air and lose their delicate crunch. Once the icing hardens, they keep perfectly in an airtight container for up to five days, making them ideal for advance planning if you're decorating in stages. If you're shipping them or need to gift them, wrap each cookie individually in tissue paper so the icing stays pristine.
- Make the dough up to three days ahead and keep it wrapped in the fridge, or freeze it for up to two months if you want to bake fresh whenever the mood strikes.
- If gel coloring stains your hands or piping bags, rub them with lemon juice and salt to lift the color quickly.
- These cookies pair beautifully with delicate herbal teas, sparkling lemonade, or even a light prosecco at celebrations.
 Save
Save These cookies remind me that celebration food doesn't have to be complicated to feel meaningful. There's something genuinely lovely about offering someone something beautiful that you made with your hands, and these flowers deliver exactly that kind of quiet joy.
Recipe FAQ
- → How can I achieve tender cookies?
Chilling the dough before rolling helps relax gluten and firms the dough, resulting in tender, delicate cookies.
- → What is the best way to color the icing?
Use gel food coloring for vibrant, smooth pastel shades. Add gradually and mix thoroughly to maintain icing consistency.
- → Can I substitute butter for a dairy-free alternative?
Yes, plant-based butter or margarine can replace unsalted butter for a dairy-free version without compromising texture.
- → How long should the icing set before serving?
Allow the royal icing to fully dry and harden, usually a few hours at room temperature, for clean, stable decorations.
- → What tools are essential for shaping these cookies?
A flower-shaped cookie cutter and piping bags with small tips are recommended for precise shapes and detailed icing decorations.
- → Can I add extra flavors to the dough?
Adding a drop of almond extract enhances flavor subtly without overpowering the delicate sweetness.