 Save
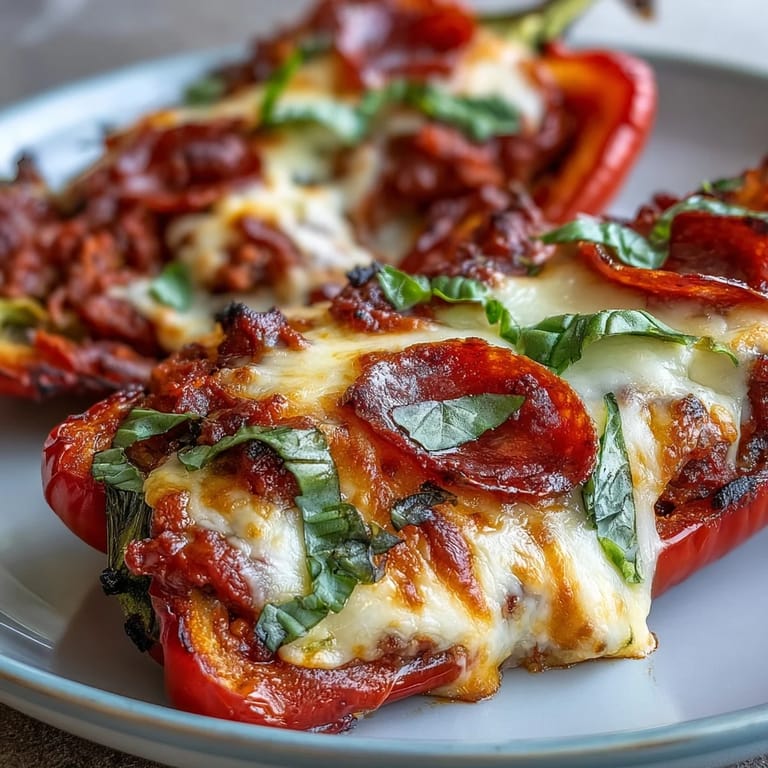
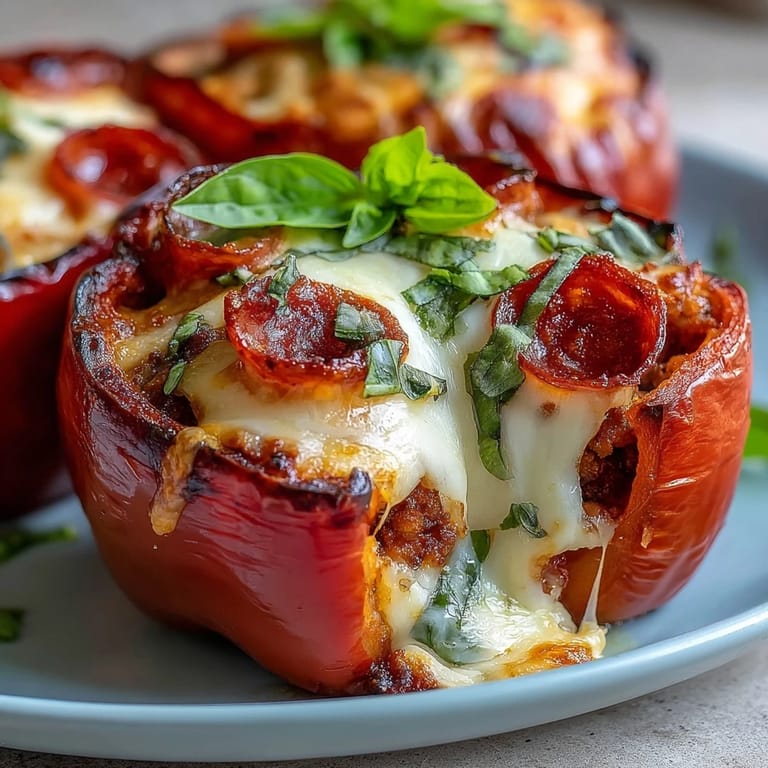
Save My husband came home from work one Tuesday and immediately asked if we could do pizza night, but he'd just started keto and felt frustrated by all the restrictions. I stared at the four bell peppers sitting in the crisper drawer and thought, why not? Twenty minutes later, we were biting into these golden, cheesy pepper halves that tasted exactly like pizza—without the guilt or the carb crash that usually followed. That meal became our weekly tradition, and honestly, some weeks he prefers these to actual pizza.
I made this for a friend who'd just started her keto journey and was genuinely grieving bread and pizza crust. Watching her face light up when she took that first bite—the marinara mingling with melted cheese, the pepperoni giving little bursts of salt and smoke—was the moment I realized how powerful it is to adapt dishes you love rather than abandon them entirely.
Ingredients
- 4 large bell peppers: Use any color you like; they'll all work beautifully and add a natural sweetness that plays well against the savory filling, though red peppers tend to be the sweetest.
- 1 cup sugar-free marinara sauce: This is non-negotiable for keeping carbs down—check labels because some brands sneak in hidden sugars.
- 1 ½ cups shredded mozzarella cheese, divided: Fresh mozzarella gets a bit watery when baked, so stick with the pre-shredded kind; it melts more evenly.
- ½ cup mini pepperoni slices: These little rounds crisp up at the edges and add those pockets of salty, spicy goodness that make this feel like real pizza.
- ½ cup cooked Italian sausage, crumbled (optional): If you go this route, brown it separately and drain the fat—it adds serious depth and makes the dish feel more complete.
- ¼ cup grated Parmesan cheese: This is your secret weapon for extra umami and a golden, crusty top layer.
- 1 tablespoon olive oil: A light coating helps the peppers soften without drying out.
- 1 teaspoon dried Italian seasoning: Don't skip this; it ties the whole thing together and makes your kitchen smell like an Italian grandmother's house.
- ¼ teaspoon crushed red pepper flakes (optional): A little heat rounds out the flavors and keeps things interesting.
- Salt and black pepper, to taste: Taste as you go because peppers and cheese vary in saltiness.
- 2 tablespoons chopped fresh basil or parsley: This bright green finish isn't just for looks—it cuts through the richness and makes you feel like you're eating something fresh, not heavy.
Tired of Takeout? 🥡
Get 10 meals you can make faster than delivery arrives. Seriously.
One email. No spam. Unsubscribe anytime.
Instructions
- Prep and Position:
- Heat your oven to 400°F and halve those peppers lengthwise, scooping out the seeds and white membranes—don't worry about being perfect here. Brush each pepper half lightly with olive oil, sprinkle salt and pepper inside, and arrange them cut-side up in a baking dish so they sit snug and won't tip.
- Mix the Magic:
- In a bowl, combine your marinara, 1 cup of the mozzarella, the sausage if you're using it, half the pepperoni, Italian seasoning, and red pepper flakes, stirring until everything is evenly distributed. Taste it—this is your filling's moment to shine, so adjust seasoning as needed.
- Fill with Confidence:
- Spoon the mixture generously into each pepper half, dividing it evenly so everyone gets their fair share of all those good things. Don't overstuff; you want the filling nestled in, not piled dangerously high.
- Layer the Cheese:
- Top each stuffed pepper with a sprinkle of remaining mozzarella, a few more pepperoni slices, and a light dusting of Parmesan—these three layers are what create that gorgeous golden, bubbly top.
- Bake Covered:
- Loosely cover the baking dish with foil and slide it into the oven for 20 minutes—the foil keeps things moist while the filling heats through. You'll start smelling that marinara and melted cheese pretty quickly, which is when you know good things are happening.
- Finish with Gold:
- Pull off the foil and bake uncovered for another 10 minutes until the cheese is bubbling at the edges and turning golden brown and the peppers are tender when pierced with a fork. This final push gives you that gorgeous caramelized top that makes it look like you spent all day on it.
- Cool and Garnish:
- Let everything rest for 5 minutes before serving—this helps the peppers hold their shape and gives the filling a chance to set slightly. Scatter fresh basil or parsley over the top right before eating for that final pop of color and freshness.
 Save
Save Last summer, I made these for a small gathering and my mom—who's been trying to cut carbs—asked for the recipe before dessert even came around. It reminded me that good food isn't about restriction or sacrifice; it's about enjoying what you eat without overthinking it. That's when I really understood why this dish has become such a staple.
Why This Beats Regular Pizza Night
There's something about eating pizza from a pepper vessel that makes you feel smarter about your choices. You're getting your vegetables, your cheese, your flavor—but the portion control is built right in because you can only eat what fits in the pepper. You don't find yourself halfway through a second slice wondering where the time went.
Making It Your Own
One night I had leftover mushrooms and decided to sauté them with the sausage instead of using pepperoni, and honestly, that might've been even better. The beauty of this dish is that it's fundamentally about stuffed peppers with a pizza flavor profile, so you can swap ingredients based on what you have or what you're craving. I've used provolone instead of mozzarella, added fresh spinach to the filling, even tried a mix of cheeses just to see what happened.
Timing and Temperature Tips
The 400°F temperature is hot enough to soften the peppers and get that cheese golden without burning the edges, but if your peppers are particularly thick-walled, you might need an extra 5 minutes. I learned this the hard way when I once used the largest peppers I could find and they came out still a bit crunchy—now I stick to peppers that feel medium-sized in my hand. One more thing: if you're adding cooked sausage, make sure it's actually cool before you mix it with the cheese, or you'll end up with a grainy, broken mess.
- Always check that the peppers are genuinely tender by piercing with a fork before you call it done.
- Leftover stuffed peppers reheat beautifully in a 350°F oven for about 10 minutes, still with foil on so they don't dry out.
- You can actually assemble these completely the night before, cover and refrigerate, then just pop them in the oven when you're ready—they'll need an extra 5 minutes since they're starting cold.
 Save
Save These stuffed peppers remind me that eating well doesn't have to feel like deprivation—sometimes it just takes looking at your ingredients differently. Make them tonight and see why they've become our version of pizza night.
Recipe FAQ
- → Can I make these stuffed peppers ahead of time?
Yes, you can prepare the filling and stuff the peppers up to 24 hours in advance. Store them covered in the refrigerator, then bake when ready to serve. You may need to add a few extra minutes to the baking time if starting from cold.
- → What can I use instead of pepperoni?
You can substitute cooked bacon crumbles, diced ham, grilled chicken, or leave it vegetarian with mushrooms, olives, or spinach. The Italian sausage is also optional, so you can adjust the proteins based on your preferences.
- → How do I store leftovers?
Store cooled stuffed peppers in an airtight container in the refrigerator for up to 4 days. Reheat in the microwave for 2-3 minutes or in a 350°F oven until warmed through. They also freeze well for up to 3 months.
- → Can I use different colored peppers?
Absolutely! Red, yellow, and orange peppers tend to be sweeter when roasted, while green peppers have a slightly more bitter profile. Mix and match colors for variety, or choose based on your flavor preference.
- → Is the marinara sauce important to be sugar-free?
For strict keto compliance, yes—traditional marinara often contains added sugar which increases the carb count. Look for brands with no added sugar or make your own with crushed tomatoes, garlic, and Italian herbs.