 Save
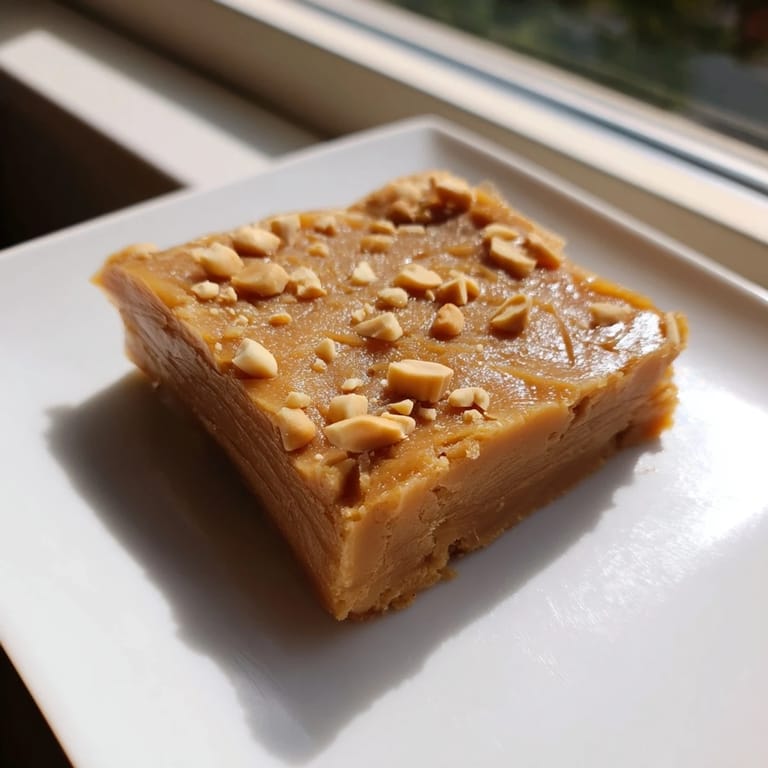
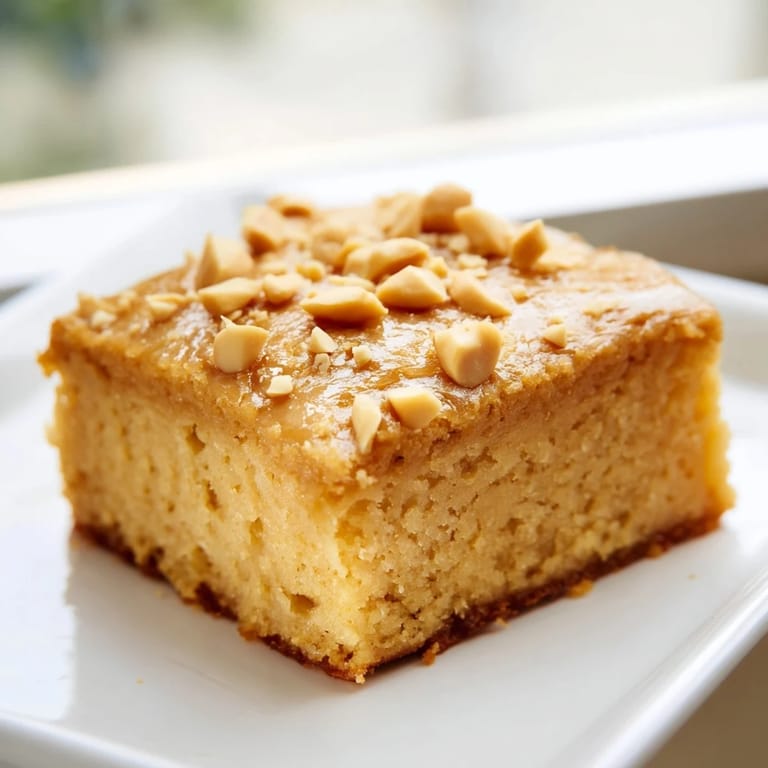
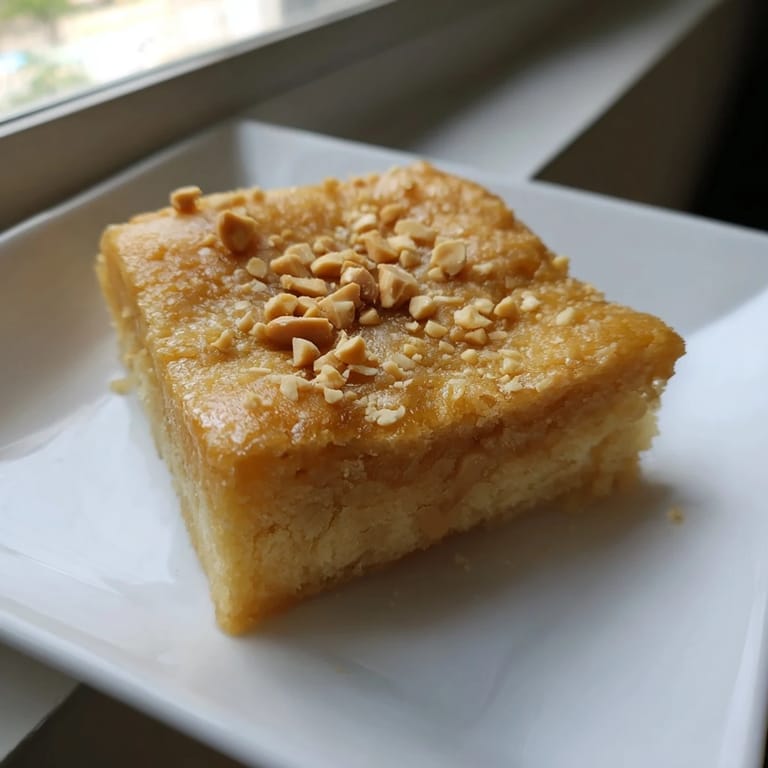
Save I pulled this cake out of the oven on a rainy Tuesday, mostly because I had leftover mochiko and a jar of peanut butter that needed using. The smell hit me before I even opened the oven door—sweet, nutty, with that unmistakable chew you only get from glutinous rice flour. My neighbor knocked right as I was cutting the first square, and by the time she left, half the pan had disappeared between us. It's become my go-to whenever I want something comforting that feels a little different, a little unexpected.
The first time I made this for a potluck, someone asked if it was Filipino bibingka. Someone else guessed it was a brownie. Both were wrong, but both came back for seconds. There's something about the way peanut butter melts into mochi that makes people curious, then quiet, then reach for another piece. I've watched it happen at least a dozen times now.
Ingredients
- Sweet rice flour (mochiko): This is the backbone of the chew—don't swap it for regular rice flour or you'll lose that signature mochi bounce.
- Granulated sugar: Just enough sweetness to balance the peanut butter without making it cloying.
- Baking powder: A small amount gives the cake just a hint of lift while keeping it dense and fudgy.
- Salt: Brings out the peanut flavor and keeps the sweetness in check.
- Whole milk: Adds richness and helps the batter stay smooth and pourable.
- Coconut milk (full fat): This is where the subtle tropical note comes from—it plays beautifully with peanut butter.
- Eggs: They bind everything together and give the cake structure without making it cakey.
- Creamy peanut butter: Use the kind that's smooth and stirs easily—natural peanut butter can make the batter grainy.
- Unsalted butter, melted: Adds a buttery finish and helps the edges crisp up in the oven.
- Vanilla extract: A quiet backdrop that deepens the flavor without stealing the show.
Tired of Takeout? 🥡
Get 10 meals you can make faster than delivery arrives. Seriously.
One email. No spam. Unsubscribe anytime.
Instructions
- Prep the Pan:
- Preheat your oven to 350°F and grease your 9x13-inch pan generously—I like to line mine with parchment so the squares lift out clean. You'll thank yourself later when you're not scraping stuck corners.
- Combine the Dry Mix:
- Whisk the mochiko, sugar, baking powder, and salt together until there are no clumps lurking in the flour. This step matters more than you'd think—lumps now mean lumps later.
- Blend the Wet Ingredients:
- In a separate bowl, whisk milk, coconut milk, eggs, peanut butter, melted butter, and vanilla until it's completely smooth. The peanut butter should disappear into the liquid—if it's still streaky, keep whisking.
- Mix It All Together:
- Pour the wet into the dry and whisk until the batter is silky and lump-free. It should flow like thick pancake batter, not dough.
- Pour and Settle:
- Pour the batter into your prepared pan and give it a few gentle taps on the counter to coax out any air bubbles. This keeps the texture even throughout.
- Bake Until Golden:
- Slide it into the oven for 45 to 50 minutes, until the top is golden brown and a toothpick comes out clean. The edges will pull away slightly from the pan—that's your cue.
- Cool Completely:
- Let the cake cool fully in the pan before you slice it. Cutting it warm will give you a gooey mess instead of clean squares.
- Serve and Store:
- Enjoy at room temperature or cold from the fridge. Keep leftovers in an airtight container—they'll stay chewy for up to five days.
 Save
Save One Sunday morning, I reheated a square in the microwave for about 15 seconds and ate it with black coffee. The warmth brought the peanut butter back to life, and the chew turned almost molten. It felt less like dessert and more like a ritual I didn't know I needed. Now I do it every weekend.
Variations You Can Try
I've stirred in chocolate chips, swapped almond butter for peanut, and even drizzled melted dark chocolate over the top after baking. A friend of mine sprinkles flaky sea salt on hers before it goes in the oven, and honestly, it's genius. You can also use evaporated milk instead of coconut if you want a cleaner peanut flavor without the tropical undertone.
Serving Suggestions
This cake is wonderful on its own, but it shines next to a dollop of whipped cream or a handful of fresh strawberries. I've served it with vanilla ice cream at birthday dinners and with hot tea on quiet afternoons. It's one of those rare desserts that works just as well at a party as it does alone at your kitchen counter at midnight.
Storage and Make-Ahead Tips
The cake actually gets better the next day once the flavors settle and the texture firms up just a bit. I usually bake it the night before I need it and let it sit covered on the counter. If you want to freeze it, wrap individual squares in plastic wrap and stack them in a freezer bag—they'll keep for up to two months and thaw beautifully at room temperature.
- Always store in an airtight container to keep the edges from drying out.
- Refrigerate if your kitchen is warm or humid—it holds up better cold.
- Reheat individual pieces in the microwave for 10 to 15 seconds to bring back that just-baked chew.
 Save
Save This cake doesn't need much fuss or fanfare to be memorable. It just needs a little time in the oven and someone willing to take the first bite.
Recipe FAQ
- → What makes this cake chewy?
The use of sweet rice flour (mochiko) creates a distinctive chewy texture, unlike regular wheat flour.
- → Can I substitute the coconut milk?
Yes, evaporated milk can be used instead for a lighter flavor while maintaining moisture.
- → How to store leftover cake?
Keep leftovers in an airtight container refrigerated to preserve freshness and texture.
- → What gives the nutty flavor?
Creamy peanut butter adds rich, nutty notes, which can be accentuated by sprinkling roasted peanuts before baking.
- → Is this suitable for gluten-free diets?
Yes, using glutinous rice flour ensures the cake is gluten-free, but cross-contamination should be checked.