 Save
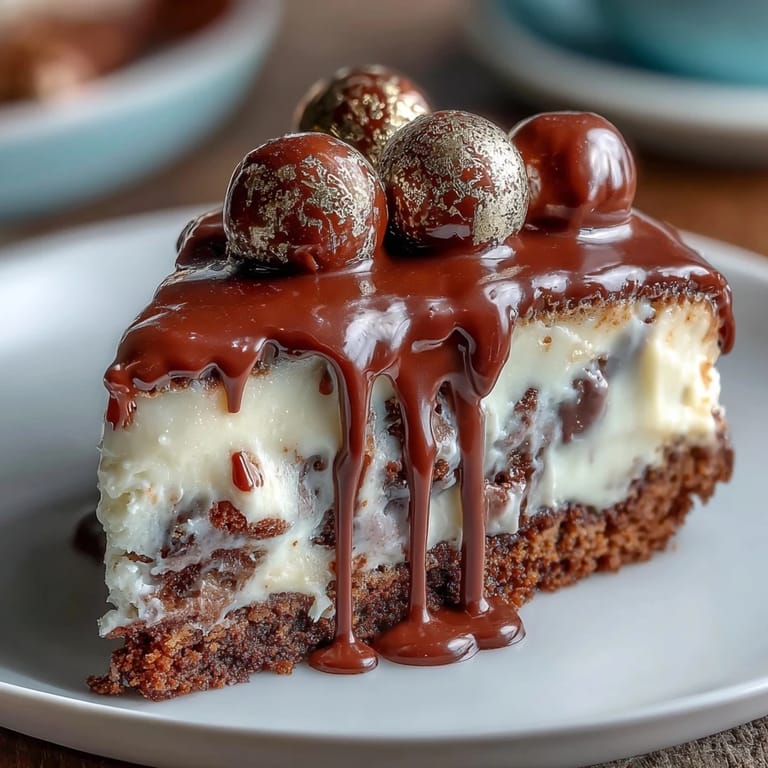
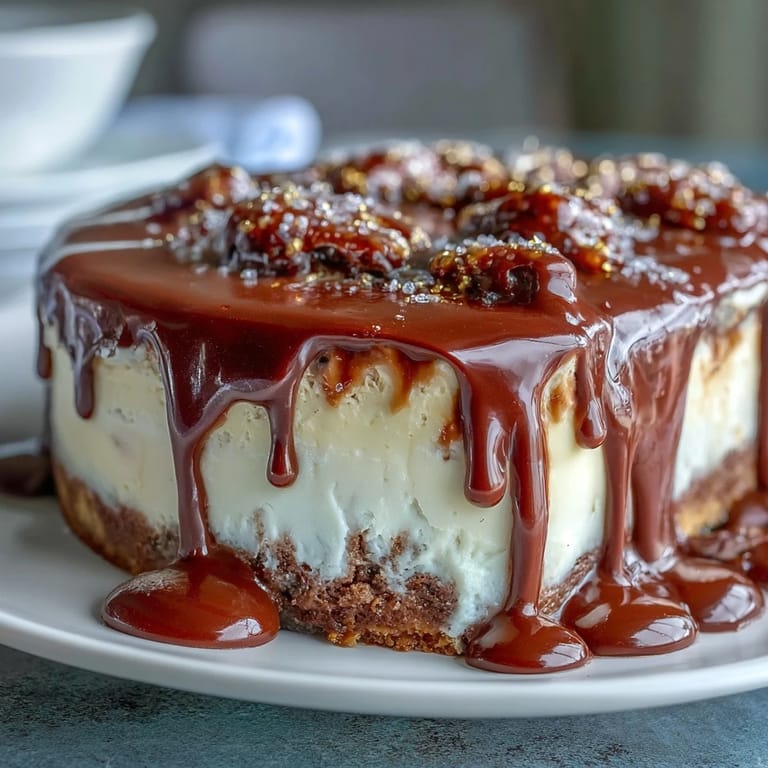
Save My sister called me three weeks before her graduation, voice bright with that particular excitement only a major milestone can bring, and asked if I'd make her cake. Not just any cake—she wanted something that felt as special as the moment itself, something with drama and gold and celebration baked right into it. I'd made plenty of cakes before, but this one needed to feel different, to taste like pride and vanilla and the kind of sweetness that marks a before and after. White chocolate seemed like the obvious choice, elegant without being fussy, and those gold balloons? Pure joy in edible form.
The night before the party, I was in my kitchen at 11 p.m., piping buttercream onto layers while my partner made coffee and offered unsolicited opinions on whether the drip was 'dripping enough.' When I finally attached those gold balloon clusters and stepped back, something shifted—it stopped being a recipe I was following and became a tangible representation of someone I love reaching a moment she'd worked toward. That's when I understood why people spend hours decorating cakes, why my grandmother always made them from scratch. It's never really about the flour and eggs.
Ingredients
- All-purpose flour (2 ½ cups): Use the spoon-and-level method rather than scooping directly from the bag, or you'll end up with dense, heavy layers that don't rise properly.
- Baking powder (2 ½ tsp): Check your supply's expiration date—old baking powder won't give you that airy crumb you're after.
- Unsalted butter (1 cup for sponge, 1 cup for buttercream): Room temperature is non-negotiable; cold butter won't incorporate smoothly and you'll get lumps in your buttercream.
- Granulated sugar (2 cups): This creams with butter to create air pockets that make the cake tender and light.
- Eggs (4 large): Room temperature eggs blend seamlessly into the batter without shocking the mixture.
- Pure vanilla extract (1 tbsp plus 1 tsp): The real stuff makes all the difference in flavor depth; imitation extract can taste thin and artificial by comparison.
- Whole milk (1 cup): Room temperature milk keeps the batter from seizing up when it hits the creamed butter and sugar.
- Powdered sugar (4 cups): Sift it before measuring to break up any clumps that could create grainy buttercream.
- White chocolate (6 oz melted for buttercream, 6 oz chopped for drip): Quality matters here—cheap white chocolate tastes waxy, but good chocolate melts silky and tastes like actual cocoa butter.
- Heavy cream (2-3 tbsp for buttercream, ¼ cup for drip): This adjusts the consistency of both the buttercream and the drip to the exact texture you need.
- White chocolate crispy pearls or malt balls: These become 'balloon' bases when you spray them with edible gold, creating a whimsical focal point.
- Edible gold spray or luster powder: A little goes a long way; this is what transforms ordinary candy into something that feels celebratory.
Tired of Takeout? 🥡
Get 10 meals you can make faster than delivery arrives. Seriously.
One email. No spam. Unsubscribe anytime.
Instructions
- Prep your pans like you mean it:
- Grease three 8-inch round pans thoroughly, then line the bottoms with parchment paper cut to fit. This double protection means your cakes won't stick, and you can easily turn them out onto cooling racks without any sticking disasters.
- Dry ingredients first, always:
- Whisk together flour, baking powder, and salt in a medium bowl to distribute the leavening evenly. This small step prevents dense pockets in your cake layers.
- Cream your base until it's fluffy clouds:
- Beat room-temperature butter and sugar together for about three minutes until the mixture is pale, fluffy, and noticeably lighter in color. You're essentially whipping tiny air bubbles into the butter, and those bubbles are what make the cake tender.
- Eggs in one at a time, waiting between each:
- Add eggs individually, beating after each one until fully incorporated before adding the next. This prevents the batter from breaking and ensures even distribution throughout.
- The alternate method keeps everything smooth:
- Starting and ending with the flour mixture, alternate adding dry ingredients and milk to your creamed mixture on low speed. This prevents overmixing, which would develop gluten and make your cake tough.
- Divide and bake with patience:
- Pour batter evenly into prepared pans, smooth the tops gently, and bake for 30–35 minutes until a toothpick comes out clean. Overbaked cakes are dry, underbaked ones are gummy—the toothpick test is your friend.
- Cool with intention:
- Let cakes rest in their pans for ten minutes (they're still setting), then turn them out onto wire racks to cool completely. Cooling in the pans too long risks them sticking; cooling on the rack prevents steam from making them soggy.
- Buttercream requires patience and room-temperature everything:
- Beat softened butter until completely smooth, then gradually add sifted powdered sugar, alternating with the melted white chocolate, vanilla, salt, and cream. The 'gradually' part is crucial—dump it all at once and you'll have a gritty, separated mess.
- The crumb coat is your secret weapon:
- After leveling and stacking your cake layers with buttercream between each, apply a thin first coat of frosting to seal in crumbs. Chill this for thirty minutes, then apply your final thick coat—this prevents visible crumbs in your finished cake.
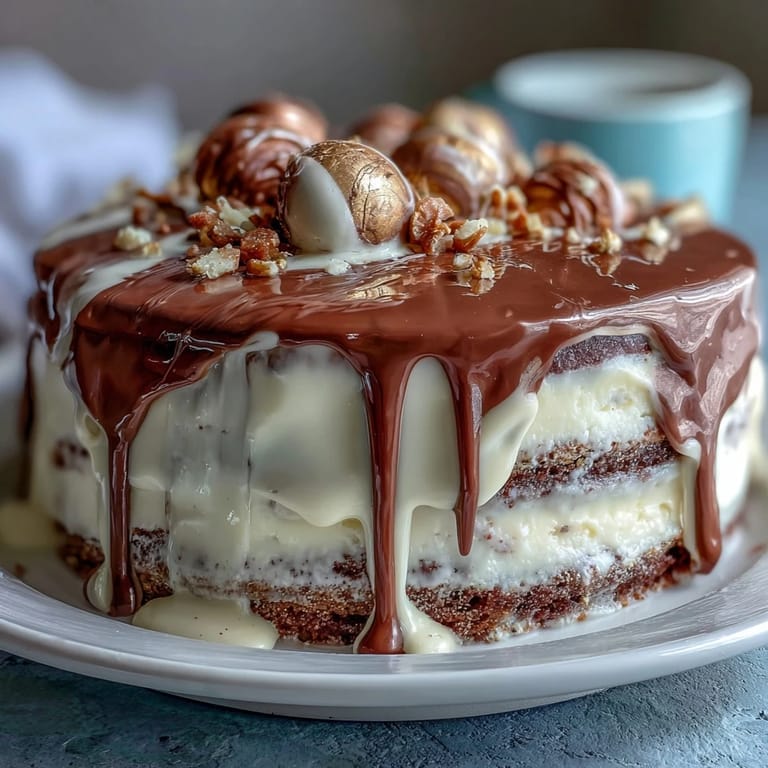
- White chocolate drip requires finesse and timing:
- Heat cream until it just steams, pour it over chopped white chocolate, wait a minute for the heat to do its work, then stir until glossy and smooth. Let it cool to room temperature so it's fluid enough to drip but thick enough to cascade beautifully.
- The drip is your moment to be artistic:
- Using a spoon or squeeze bottle, let the white chocolate drip naturally down the sides from the top edge, then fill the center with more ganache and smooth it into a polished surface. The imperfect drips actually look more professional than perfectly uniform ones.
- Gold balloons are the final flourish:
- Spray your crispy pearls or malt balls with edible gold (outdoors or in a well-ventilated space to avoid inhaling spray), let them dry completely, then attach toothpicks and arrange them in a festive cluster on top. This is where the cake goes from lovely to Instagram-worthy.
- Chill and serve at the right temperature:
- Refrigerate the finished cake until serving time, but let it come to room temperature for about thirty minutes before slicing so the flavors are fully pronounced and the crumb is tender.
 Save
Save Watching my sister's face when she saw the finished cake—when she spotted those gold balloons and that perfect white chocolate drip—made every step worth it. She said it was too pretty to cut, then immediately cut a slice anyway because it smelled too good to resist, and that small contradiction felt like exactly what celebration should be. Food has this quiet power to mark moments, and this cake did exactly that.
The Vanilla Sponge Strategy
The foundation of this cake lives or dies by how well you treat that vanilla sponge. The trick isn't complicated, but it requires respect for the process—every ingredient needs to be room temperature, which means pulling eggs, milk, and butter out of the refrigerator about an hour before you start. I learned this the hard way after making a cake where the batter looked separated and grainy, and realized halfway through that I'd used cold eggs straight from the fridge. The cake baked fine, but the crumb wasn't as delicate, the rise wasn't as even. That single change—letting everything warm up—transformed the texture from good to extraordinary.
White Chocolate: The Tricky Ingredient
White chocolate behaves differently than dark or milk chocolate, and if you treat it like regular chocolate, you'll end up with a grainy, seized mess that makes you want to throw it across the kitchen. The issue is cocoa butter, which is temperamental and burns easily. When you're melting it for the buttercream, use gentle heat—either a double boiler or short bursts in the microwave, stirring between each pulse. For the drip, the cream does most of the work; you're not melting the chocolate aggressively, you're gently coaxing it into smoothness with warmth from the cream. This gentler approach gives you silky, luxurious results.
Decorating with Confidence
The white chocolate drip looks like it requires professional pastry training, but honestly, it's one of the most forgiving decorating techniques because imperfection is the whole aesthetic. The gold balloons add whimsy and celebration without requiring precision; they're meant to feel playful, not perfect. My advice is to stop overthinking it and trust that these elements are designed to look beautiful precisely because they're a little irregular.
- If your drip is too thick, warm it slightly over a double boiler and try again.
- The gold balloons don't need to be evenly spaced—cluster them casually for more visual impact.
- Practice your drip technique on a test plate first if you're nervous; you'll get a feel for the consistency and speed.
 Save
Save This cake is pure celebration in layers and frosting, the kind of dessert that makes moments feel important. Serve it with sparkling wine, let people savor it slowly, and watch how something as simple as cake and gold balloons becomes a memory worth keeping.
Recipe FAQ
- → How do I achieve a smooth white chocolate drip?
Heat heavy cream until just simmering, then pour over chopped white chocolate. Let it sit for a minute before stirring until smooth. Cool slightly before dripping for an even flow.
- → What’s the best way to keep the vanilla sponge moist?
Ensure not to overbake and cool cakes on a wire rack. Using room temperature ingredients and alternating dry and wet mixtures helps maintain moisture.
- → How can I decorate with gold balloons safely?
Spray white chocolate pearls or malt balls with edible gold spray or dust with gold luster powder. Let dry fully before inserting toothpicks or wires for placement.
- → Can I prepare the buttercream ahead of time?
Yes, the white chocolate buttercream can be made a day ahead and refrigerated. Bring to room temperature and rewhip before spreading.
- → What tools are essential for assembling this dessert?
An electric mixer, offset spatula, parchment paper, and a squeeze bottle or spoon for the drip will simplify preparation and decoration.