 Save
Save My nephew came home from school one afternoon with a permission slip and zero enthusiasm about the class bake sale. We stood in the kitchen, and I asked what might actually excite him to help make something. His eyes lit up when I mentioned mixing candy into caramel popcorn—not because it was fancy, but because it felt like controlled chaos he could be part of. That moment taught me that the best snacks aren't about perfection; they're about the small thrill of throwing things together and watching them transform.
I made this for a friend's board game night, and it became the thing people remembered more than who actually won. Someone's hand would drift toward the bowl without thinking, and suddenly they'd be mid-sentence about the caramel coating while debating game strategy. By the end of the evening, we'd polished off most of it, and I realized snacks like this have a quiet magic—they make people feel taken care of without any fuss.
Ingredients
- Popcorn kernels: Use fresh kernels if you can; stale ones pop reluctantly, and you'll waste time fishing for duds in the finished bowl.
- Unsalted butter: This gives you control over the salt level, which matters because the caramel itself, plus the peanuts if you use them, brings plenty of salt to the party.
- Light brown sugar: Don't swap this for dark brown sugar unless you want a molasses undertone that'll change the whole flavor profile.
- Light corn syrup: It prevents crystallization in the caramel, keeping things smooth and glossy instead of grainy.
- Baking soda: When you stir it in, the mixture froths up spectacularly; that's exactly what you want because it aerates the caramel and makes it crispy rather than chewy.
- Vanilla extract: A small amount, but it rounds out the sweetness and keeps the flavor from feeling one-dimensional.
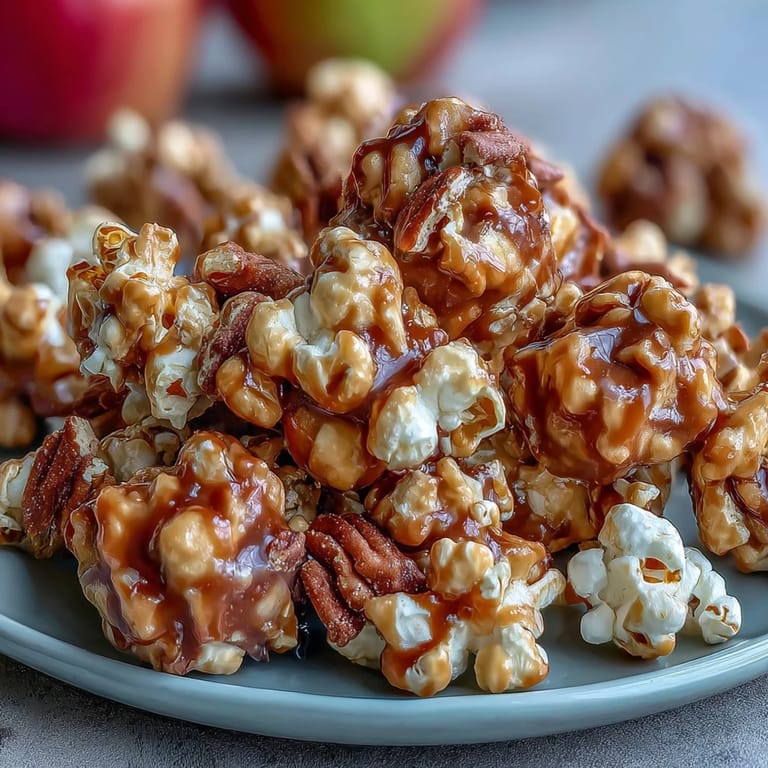
- Dried apple rings: Chop them into manageable pieces so they distribute evenly and don't overwhelm individual bites with too much chew.
- Candy-coated chocolate pieces: They melt slightly in the warm popcorn, which is part of the appeal, so add them after everything cools or they'll turn into colored puddles.
- Salted peanuts: Optional, but they add protein and an extra textural contrast that makes this feel less like pure candy and more like an actual snack.
Tired of Takeout? 🥡
Get 10 meals you can make faster than delivery arrives. Seriously.
One email. No spam. Unsubscribe anytime.
Instructions
- Get your oven ready and set the stage:
- Preheat to 250°F and line a baking sheet with parchment paper—this temperature is low enough that the caramel won't burn while you're stirring, which matters more than you'd think. Pop your popcorn and put it in a large bowl, removing any stubborn kernels that refuse to cooperate.
- Build your caramel sauce:
- Melt the butter in a medium saucepan over medium heat, then add the brown sugar, corn syrup, and salt. Stir constantly until everything bubbles up and comes to a rolling boil—this takes about 5 minutes and you'll know it's ready when the mixture looks unified and glossy.
- Let it boil undisturbed:
- Once it's boiling, step back and let it go for 4 to 5 minutes without stirring. This is when the caramel deepens in flavor and the sugar molecules break down properly.
- The magic bubble moment:
- Remove from heat and quickly stir in the baking soda and vanilla—the mixture will bubble and froth like a tiny volcano, which is exactly right. This bubbling is what makes your final popcorn crispy instead of dense.
- Coat the popcorn thoroughly:
- Pour the hot caramel over your popcorn immediately and toss gently with a spatula, making sure every piece gets coated. Work quickly because caramel sets fast, and you want even coverage.
- Bake until it sets:
- Spread the coated popcorn on your prepared baking sheet and bake for 40 minutes, stirring every 10 to 15 minutes. You'll notice the mixture going from wet and clumpy to gradually drying out and separating into individual pieces.
- Cool and break it apart:
- Let it rest for 10 minutes out of the oven, then break up any clusters that formed while it was warm. This step prevents everything from becoming one solid brick.
- Add the fun mix-ins:
- Once everything is completely cool, fold in the dried apples, candy pieces, and peanuts if using. Add them after cooling so they stay fresh and don't get soft from residual heat.
- Store with care:
- Transfer to an airtight container where it'll keep for up to 3 days, though honestly, it rarely lasts that long.
 Save
Save The best part about this snack isn't really the snack itself—it's the moment someone you've made it for closes their eyes while eating and just smiles. No words, no elaborate compliments, just that quiet satisfaction of something tasting exactly like comfort and celebration mixed together.
Why the Caramel Method Matters
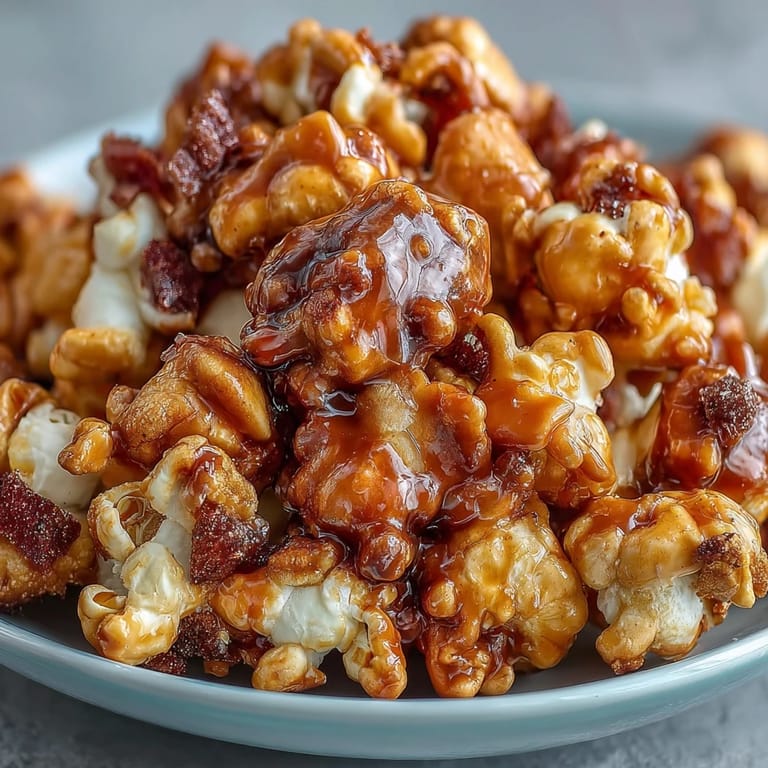
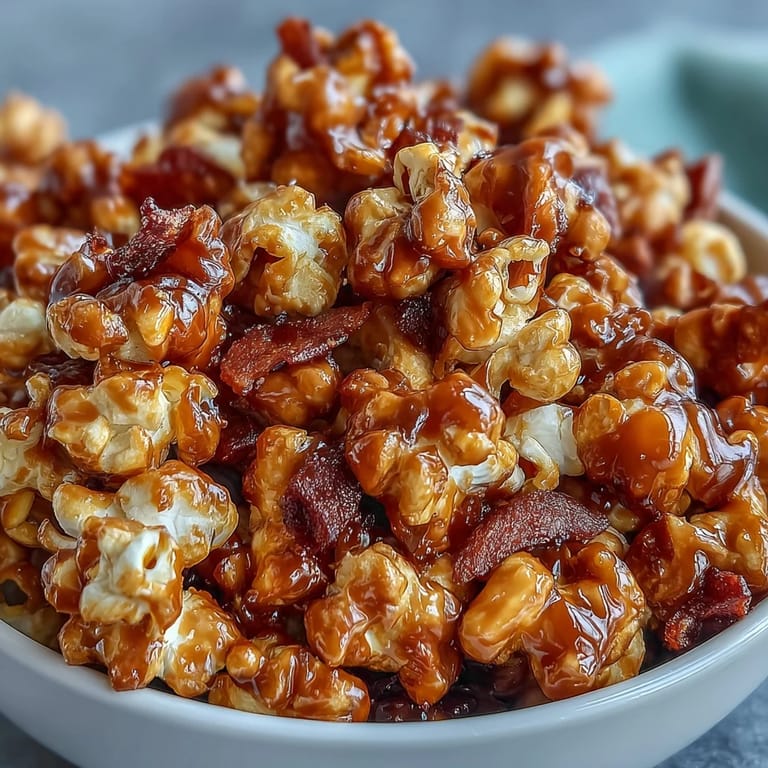
Traditional caramel popcorn recipes sometimes use a different approach, but this one's method—boiling first, then adding baking soda—creates a structural difference in how the caramel sets. When you add baking soda to hot caramel, it creates tiny air pockets that make the final product light and crispy rather than dense. This is the small detail that separates homemade popcorn mix from the dense, jaw-aching versions you sometimes find in old candy tins.
Customizing Your Mix
This recipe is genuinely flexible, which is part of why people keep making it. You can swap dried apples for dried cranberries, change the candy pieces to something else entirely, or add a pinch of cinnamon directly into the caramel sauce if you're feeling autumnal. The structure stays the same, but the personality changes based on what you're in the mood for or what you have sitting in your pantry.
Storage and Serving Wisdom
The first day is peak crispiness, but if you seal it properly in an airtight container, it stays surprisingly good through day three. Some people package individual portions in small paper bags as gifts, which somehow makes the snack feel even more thoughtful than handing over a container. Temperature matters too—keep it away from humidity and heat, or the caramel will start feeling sticky instead of crispy.
- Make this on a dry day rather than a humid one; moisture is caramel's sworn enemy.
- If you're gifting it, add a note saying it's best enjoyed within three days so they know to dive in quickly.
- A quick oven warm-up (250°F for 5 minutes) can refresh the crunch if it starts to soften after a day or two.
 Save
Save This is one of those recipes that reminds you why homemade snacks matter—not because they're healthier or more sophisticated, but because they taste like someone cared enough to stir a pot and arrange things thoughtfully. Make it once and you'll make it again, probably before the week is over.
Recipe FAQ
- → How is the caramel coating made?
The caramel is created by melting butter with brown sugar, corn syrup, and salt, brought to a boil and then combined with baking soda and vanilla to achieve a smooth, bubbly texture that coats the popcorn evenly.
- → Can I omit the peanuts?
Yes, peanuts are optional and can be omitted to make a nut-free version without compromising the overall flavor and crunch.
- → What is the best way to ensure even coating?
Stirring the popcorn every 10–15 minutes while baking helps the caramel coat the popcorn uniformly and prevents clumping.
- → How should this mix be stored?
Store it in an airtight container at room temperature to keep it fresh and crunchy for up to three days.
- → Can I add other flavorings to the caramel?
A sprinkle of cinnamon added to the caramel sauce enhances the flavor with a warm spice note, complementing the sweetness.