 Save
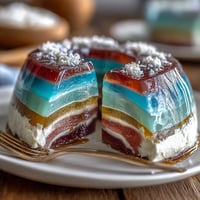
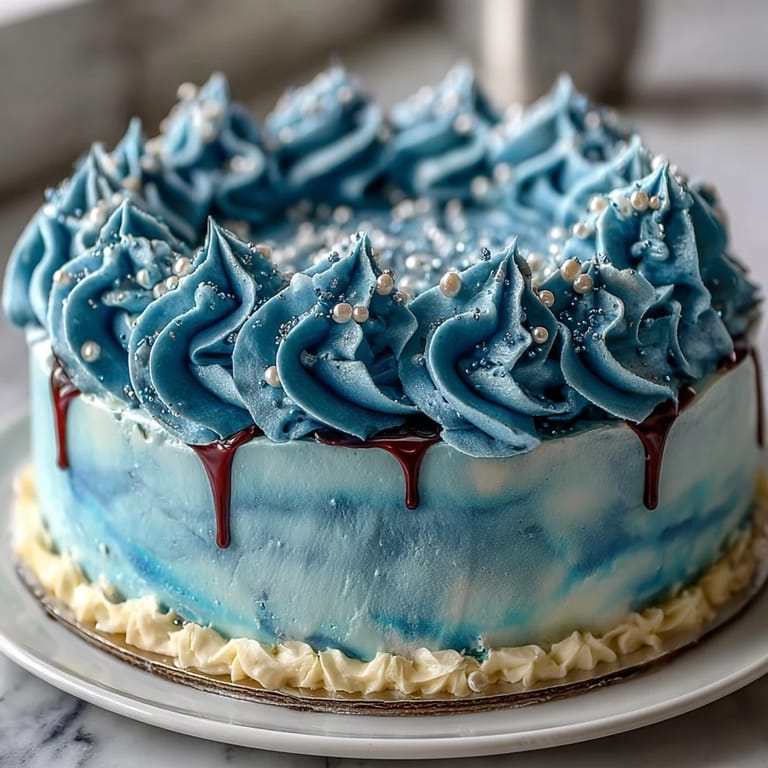
Save My friend texted me a photo of her Pisces tattoo right after we met for coffee, and honestly, I became obsessed with baking her a cake that captured that dreamy water energy. I spent an afternoon experimenting with blue ombré techniques, watching the colors shift from deep ocean to pale aqua, and something about layering those buttercreams felt almost meditative. The moment the waves came together on the cake, I knew this was the one—it looked like you could dive right into it. She cried when she saw it, which might sound dramatic, but that's when I realized this cake had become something more than just vanilla and frosting.
I brought this cake to a birthday dinner during a full moon in August, and everyone gathered around it like it was some kind of edible artwork. One person swore they could taste the ocean in it (they couldn't, but the power of suggestion is real). What stuck with me was how something so visually ambitious ended up being completely achievable in a home kitchen, and how it made people slow down and actually appreciate a dessert instead of just wolfing it down.
Ingredients
- All-purpose flour: The backbone of a tender crumb—don't skip sifting the powdered sugar later, as lumps will sabotage your frosting smoothness.
- Baking powder: This gives the cake lift without any egg-heavy taste, so make sure it's fresh and not sitting in your cabinet from last year.
- Salt: A small amount amplifies vanilla flavor and balances sweetness in ways you won't consciously notice but will definitely taste.
- Unsalted butter: Room temperature is non-negotiable here—cold butter won't cream properly, and your cake will be dense.
- Granulated sugar: This creams with butter to trap air, which is what makes the final cake tender and light.
- Eggs: Room temperature eggs incorporate smoothly into the batter, creating a more cohesive structure.
- Pure vanilla extract: Use the real stuff—imitation won't give you that subtle warmth that makes people ask what's in it.
- Whole milk: The dairy fat contributes to moistness, and whole milk feels more forgiving than skim.
- Powdered sugar: Sifting removes lumps that will leave you frustrated during frosting, so take the extra minute.
- Blue gel food coloring: Gel coloring keeps your frosting thick and spreadable, unlike liquid food coloring which can thin it out considerably.
- White gel food coloring: A tiny amount goes a long way when lightening blues for your ombré, preventing grayish tones.
- Edible pearls: These add texture and catch light in a way that makes the ocean effect feel complete.
Tired of Takeout? 🥡
Get 10 meals you can make faster than delivery arrives. Seriously.
One email. No spam. Unsubscribe anytime.
Instructions
- Set yourself up for success:
- Preheat your oven to 350°F and line a 9x13-inch pan with parchment paper, letting it hang slightly over the edges so you can lift the cooled cake right out. Having everything prepped and within arm's reach means you won't panic when the batter is ready to go.
- Combine your dry ingredients:
- Whisk flour, baking powder, and salt together in a medium bowl, breaking up any hidden lumps in the flour as you go. This distributes the leavening evenly throughout the batter.
- Cream butter and sugar into clouds:
- Beat softened butter with granulated sugar for about 3 minutes until it looks pale, fluffy, and almost mousse-like when you lift the beaters. This step is where the cake gets its tender crumb, so don't rush it.
- Incorporate eggs one by one:
- Add each egg individually, waiting for it to blend in completely before adding the next, then beat in vanilla extract until you smell that unmistakable vanilla perfume filling your kitchen. This patient approach prevents a curdled-looking mixture.
- Alternate flour and milk gently:
- Starting and ending with the flour mixture, add them in three additions while alternating with the milk, stirring just until combined after each addition. Overmixing at this stage will toughen your cake, so stop as soon as you don't see streaks of flour.
- Bake until just set:
- Pour batter into your prepared pan and smooth the top, then bake for 28–32 minutes until a toothpick inserted in the center comes out clean. The cake will smell buttery and vanilla-forward when it's ready.
- Cool with patience:
- Let the cake rest in the pan for 10 minutes so it firms up slightly, then turn it out onto a wire rack and let it cool completely to room temperature before frosting. This prevents melted frosting from sliding off a warm cake.
- Cream your frosting base:
- Beat softened butter on medium speed for about 2 minutes until it's pale and creamy, then gradually add sifted powdered sugar on low speed so you don't create a sugar cloud in your kitchen. Add vanilla and milk, then beat on medium until the frosting is fluffy and spreadable.
- Tint your buttercream ocean:
- Divide frosting into 3–4 bowls and tint each with varying shades of blue gel coloring, from deep ocean blue to pale aqua, leaving one portion white for contrast and sea foam. Gel coloring mixes smoothly without thinning out your frosting like liquid coloring would.
- Apply a crumb coat:
- Spread a thin layer of white buttercream over the entire cooled cake to trap any loose crumbs, then chill for 20 minutes until it sets slightly. This step makes your final layers look clean and intentional.
- Layer your waves:
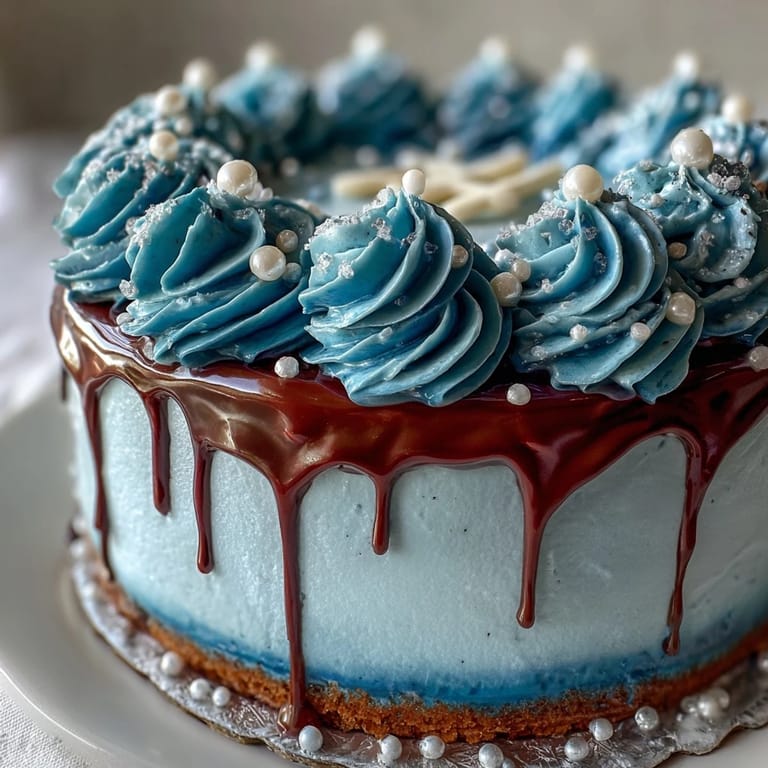
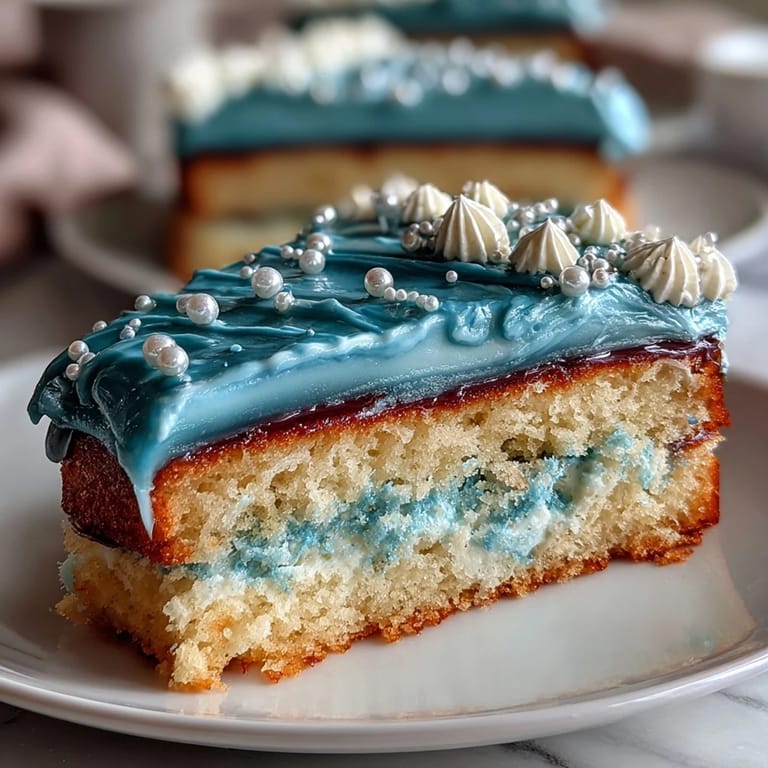
- Using an offset spatula, layer the blue buttercreams in wave-like swooping shapes across the cake, starting with the darkest shade at the base and working toward lighter shades at the top to mimic ocean depth. The imperfections in your waves actually look more authentic and beautiful.
- Add the sea foam:
- Pipe or swirl white buttercream on top to create sea foam crests, following the contours of your waves and building height where it feels natural. This is where the cake truly comes alive.
- Finish with details:
- If using them, scatter edible pearls across the frosting and add a Pisces symbol made from white chocolate or fondant as a finishing flourish. This is optional, but it's the detail that makes people say "you really thought of everything."
 Save
Save There's something magical about watching someone's face light up when they see a cake that matches their energy, their sign, their whole aesthetic. This cake became the gateway to a tradition—now friends ask me to make zodiac-themed cakes for their gatherings, each one a little different but all carrying that same love of detail and whimsy.
Why the Ombré Technique Works Here
The ombré effect isn't actually difficult once you understand that you're just spreading frosting in layers and letting the color shift naturally from dark to light. I learned this by accident when I didn't have enough of one shade mixed and had to improvise, creating a smoother transition than if I'd planned it perfectly. The waves form almost automatically when you use swooping motions with your spatula, and any wobble or curve adds character rather than detracting from it.
Flavor Variations That Elevate the Cake
The vanilla sponge is intentionally subtle because it lets the buttercream shine, but you can absolutely twist it with a tablespoon of lemon zest added to the batter for brightness. I've also experimented with almond extract (just half a teaspoon) mixed with the vanilla, and it adds an almost sophisticated undertone that pairs beautifully with the ocean theme. The point is to know that you can play with the flavor profile without changing the structure of the cake itself.
Decorating Day Wisdom
Plan to decorate the cake on the day you'll serve it so the frosting stays bright and the piping doesn't become too firm to work with. If you must do it earlier, store the finished cake in a cool room away from direct sunlight, as the colors will fade if exposed to bright light for hours. Here are the final touches that make all the difference:
- Have a warm, damp cloth nearby to clean your spatula between color applications so you don't muddy your shades.
- If your piping bag gets frustrating, try using a small offset spatula instead to swirl the white frosting—sometimes the simplest tool works best.
- Step back frequently to see the overall effect instead of focusing too hard on individual details, which helps you stay confident.
 Save
Save Baking this cake is less about following rules and more about trusting yourself to create something beautiful for the people you love. The water will always find its way down the page, and your frosting will find its way into waves.
Recipe FAQ
- → How do I achieve the ombré blue buttercream effect?
Divide the buttercream into portions and gradually add gel blue food coloring, from deep navy to light aqua. Spread each shade in wave patterns, blending softly for a seamless gradient.
- → What is the best way to create wave piping on the cake?
Use a petal or round piping tip and apply smooth, swooping motions from base to top in layers. Chill between layers to maintain clean wave shapes.
- → Can I prepare the sponge ahead of time?
Yes, bake the sponge a day before decorating and wrap it tightly to keep moisture. Bring to room temperature before applying buttercream.
- → What alternatives exist for decorating the Pisces symbol?
Use white chocolate molds or fondant cutouts shaped into the Pisces glyph. Edible pearls add an elegant touch around the symbol.
- → How to keep the buttercream smooth and fluffy?
Beat softened butter on medium speed until creamy, then add powdered sugar slowly. Mix in vanilla and milk last, combining until light and airy.