 Save
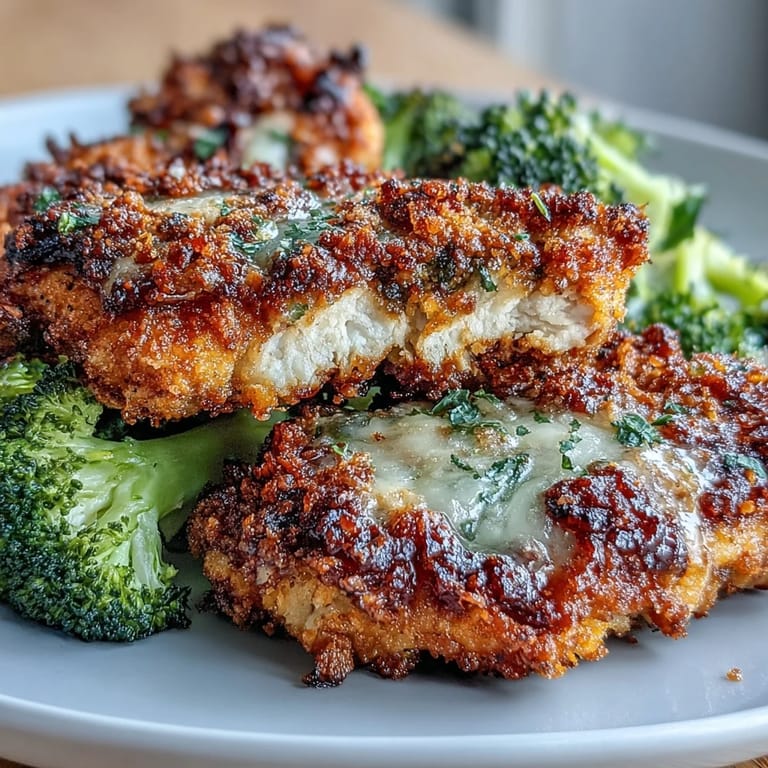
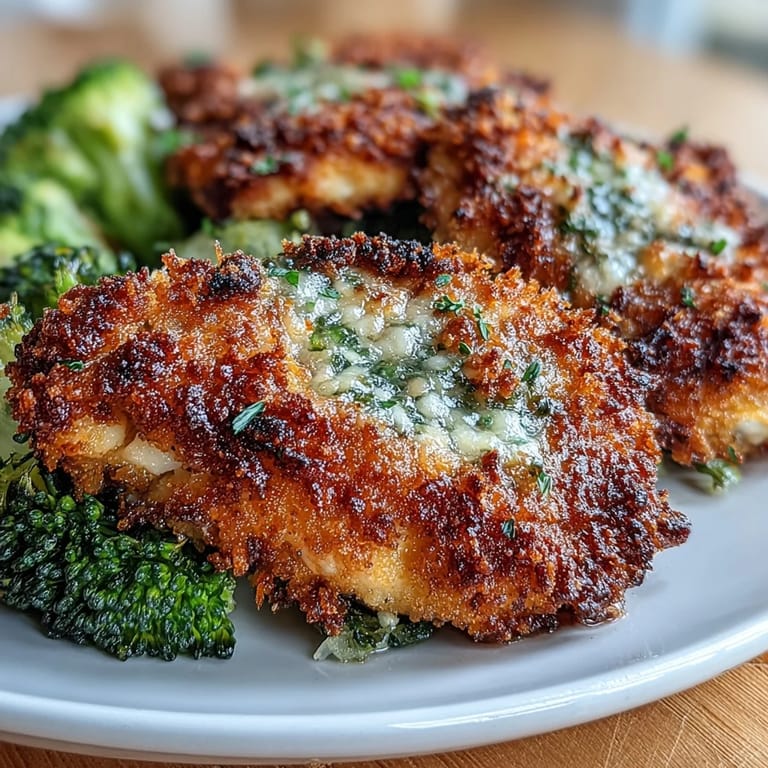
Save One weeknight, I was standing in front of my open fridge with absolutely nothing planned, just the usual suspects staring back at me—chicken breasts, broccoli, and a wedge of Parmesan I'd bought on impulse. My partner was tired, I was tired, and we needed something on the table fast that didn't taste like we'd given up. That's when I realized if I could get everything golden and crispy on a single tray, we'd actually feel like we'd made something worth eating. Turns out, one sheet pan and 40 minutes later, we had a dish so good it became our default weeknight answer.
I made this for my sister's family on a Sunday afternoon when the kids were bouncing off the walls waiting for lunch, and I needed something that would impress without stress. The moment those trays came out of the oven, the aroma alone stopped them mid-chaos—everyone gravitated to the kitchen and actually sat still long enough to eat together. That's when I knew this recipe had staying power.
Ingredients
- Boneless, skinless chicken breasts (4, about 150 g each): These cook evenly and stay moist when you don't overcrowd the pan and give them proper heat. Pat them dry before seasoning so the coating adheres better.
- Olive oil (2 tbsp for chicken, 1.5 tbsp for broccoli): The oil is what prevents sticking and helps everything get golden, so don't skimp on this.
- Garlic powder and dried Italian herbs: These flavors sink into the chicken as it roasts, building a savory foundation under the crust.
- Kosher salt and black pepper: Season each component separately so the flavors are balanced throughout, not just on top.
- Broccoli florets (2 medium heads, about 800 g): Cut them to roughly the same size so they roast evenly; larger pieces stay crunchier if that's your preference.
- Panko breadcrumbs (1 cup): Panko is larger and airier than regular breadcrumbs, which is why it gets so satisfyingly crispy when mixed with butter and Parmesan.
- Freshly grated Parmesan (3/4 cup): Grate it yourself if you can—pre-grated loses moisture and won't crisp up the same way, and you'll actually taste the difference.
- Unsalted butter, melted (2 tbsp): This is the binder that turns your panko and Parmesan into something that sticks and crisps, not just falls off.
- Fresh parsley and lemon zest (optional): These lift the whole dish with brightness; I skip them sometimes when I'm rushed, but they genuinely elevate it.
Tired of Takeout? 🥡
Get 10 meals you can make faster than delivery arrives. Seriously.
One email. No spam. Unsubscribe anytime.
Instructions
- Set up your workspace:
- Heat your oven to 220°C (425°F) and line a large baking sheet with parchment paper. This temperature is hot enough to crisp the topping without drying out the chicken.
- Build the crust mixture:
- Combine your panko, Parmesan, melted butter, and any optional parsley and lemon zest in a small bowl. The mixture should feel slightly damp and clumpy, not powdery—that's how you know the butter is doing its job.
- Season the chicken:
- Place chicken breasts on one side of your prepared tray, drizzle with olive oil, then rub generously with garlic powder, Italian herbs, salt, and pepper. Arrange them so there's a little space between each breast so heat can circulate.
- Prep the broccoli:
- Toss your florets on the other side of the tray with olive oil, salt, and pepper, spreading them in a single layer so they toast rather than steam. If your broccoli is really crowded, use a second tray—you want them to have room to breathe.
- Crown with the crust:
- Sprinkle the panko-Parmesan mixture generously over both the chicken and broccoli, pressing lightly so it sticks rather than sliding off. Don't be shy here—you want a good coating on both components.
- Roast until golden:
- Slide everything into the oven for 23–25 minutes, checking that the chicken has reached an internal temperature of 74°C (165°F) and the topping is golden and crispy. You can use an instant-read thermometer to be sure, which takes the guesswork out completely.
- Optional final crisp:
- If you want extra crunch (and honestly, who doesn't), turn on the broiler for 1–2 minutes at the end, but watch it closely so nothing burns. This step is optional but it's the difference between crispy and extra-crispy.
- Rest before serving:
- Let the tray sit for about 3 minutes so the chicken relaxes and stays juicy when you cut into it. This small pause makes a real difference in how tender everything tastes.
 Save
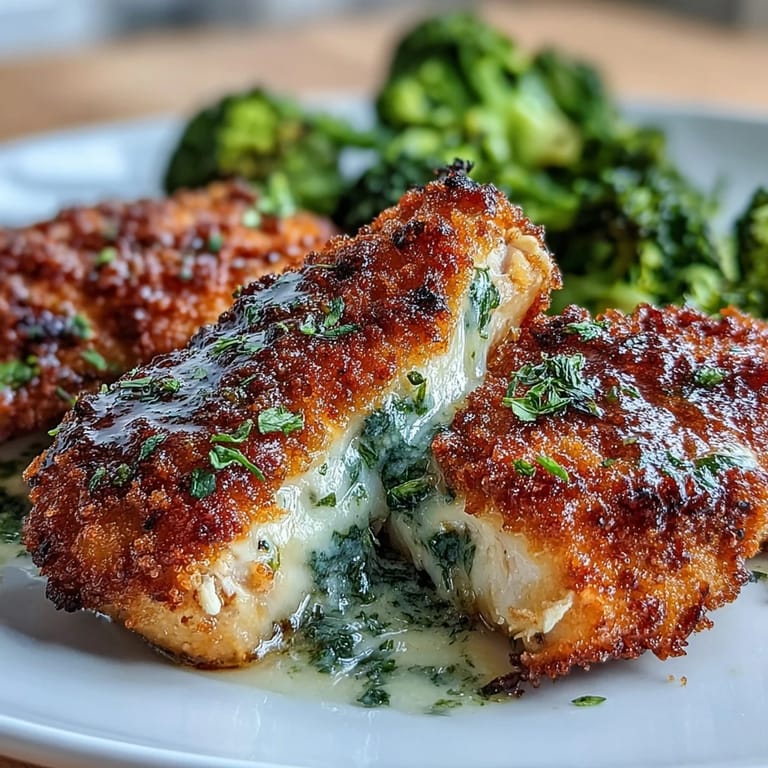
Save There's something about watching someone take their first bite of this dish and actually pause—that moment where they're tasting the crispy crust, the tender chicken underneath, and the broccoli that's somehow both crispy and tender at the same time. That's the exact feeling that turned this one-sheet dinner into something I make regularly and never tire of.
Why One Tray Changes Everything
Roasting everything together means the chicken releases its juices, which season the broccoli as it cooks, creating a subtle connection between the two that you wouldn't get if you cooked them separately. The broccoli also steams slightly from the moisture, which keeps it tender, while the exposed tops crisp up from the heat—it's the best of both worlds happening at once. I've tried splitting them into different trays out of habit, and the result always felt somehow disconnected and less flavorful.
Customizing Your Tray
Boneless, skinless thighs work beautifully here if you prefer their richer flavor and more forgiving texture—just add about 5 minutes to the cooking time since they're thicker. Some nights I swap half the broccoli for cauliflower or even thin-sliced zucchini, and the panko-Parmesan crust works just as well. A squeeze of fresh lemon juice right before serving is optional but transforms the whole thing with brightness that cuts through the richness of the crust.
Serving Ideas and Storage
Serve this over rice, quinoa, or even with crusty bread to soak up any pan drippings that accumulate—honestly, those little browned bits clinging to the parchment are some of the best flavors. Leftovers stay good in an airtight container for up to three days and actually reheat beautifully in a 180°C oven for about 10 minutes, which brings the crust back to life without drying out the chicken.
- For meal prep, cook the chicken and broccoli, then store the panko mixture separately so it stays crispy until you reheat everything together.
- This dish feeds four generously, but scales easily—just use a bigger tray and add a few more minutes to the roasting time if needed.
- Gluten-free? Use gluten-free panko and you won't miss a thing, because the flavor and texture come from the Parmesan and butter doing their magic.
 Save
Save This dish has become my answer to weeknight dinners when I want something that tastes intentional without requiring skill or hours of work. It's proof that the simplest solutions—one pan, honest ingredients, and trusting the oven to do the heavy lifting—often make the best meals.
Recipe FAQ
- → How do I ensure the chicken stays juicy?
To keep chicken moist, avoid overcooking by roasting until an internal temperature of 74°C (165°F) is reached. Letting the chicken rest for a few minutes after roasting helps retain juices.
- → Can I use chicken thighs instead of breasts?
Yes, boneless skinless chicken thighs can be swapped in. Increase cooking time by about 5 minutes to ensure they cook through.
- → How do I get the crust extra crispy?
Broil the tray for 1–2 minutes after baking to enhance the golden, crunchy texture of the Parmesan–panko topping.
- → Is there a gluten-free option for the crust?
Substitute regular panko breadcrumbs with gluten-free panko to accommodate gluten-free diets while keeping the crust crispy.
- → What sides pair well with this dish?
Serve alongside cooked rice, quinoa, or a fresh salad to complement the rich flavors and provide a balanced meal.