 Save
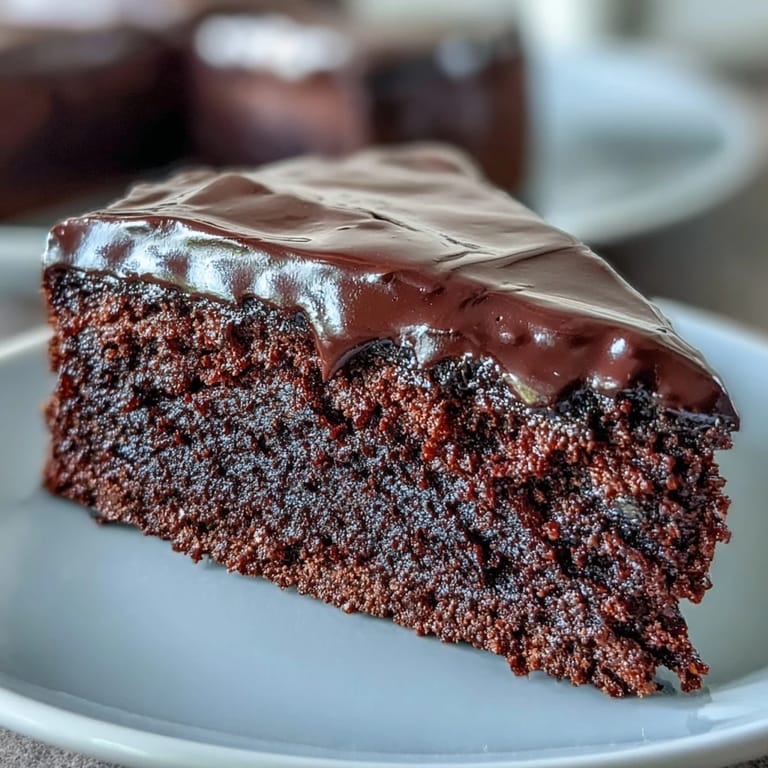
Save There's something about melting chocolate over steam that makes you feel like you're doing proper baking, even if you're really just standing there waiting. My mum used to make this cake for every birthday and celebration, and what struck me most wasn't the fancy technique—it was how the house would smell warm and chocolatey while it baked, drawing everyone downstairs to peek at the oven. The cake itself is wonderfully forgiving, which is probably why it became her go-to. Rich, squidgy, and dressed in that silky chocolate icing, it's the kind of dessert that makes people think you've fussed over them, even when you haven't.
I made this for my sister's book club once, slightly panicked because I'd volunteered to bring pudding with about three hours' notice. The icing was still warm when they arrived, so I set it in the fridge with the cake already layered up—a bit unconventional, but it worked beautifully. What I remember most is how quickly the first slice disappeared and the genuine quiet that fell over the table. Sometimes the best part of a recipe isn't the technique at all, it's knowing you've made something people actually want to eat.
Ingredients
- Unsalted butter (200 g, plus extra for greasing): Use proper butter, not spread—it matters here because you need the cocoa solids to stay distinct and chocolatey.
- Dark chocolate, chopped (200 g, minimum 50% cocoa solids): Don't use the baking chocolate that's meant to be bitter; find something you'd actually eat on its own, something that tastes rich and not harsh.
- Light brown sugar (250 g): The molasses in brown sugar adds a subtle depth that white sugar won't give you, trust this small detail.
- Eggs (3 large): Room temperature makes a real difference when you're whisking them with sugar—cold eggs are sluggish and won't fluff up properly.
- Plain flour (200 g): If you weigh it rather than scoop it, you'll avoid that dense, heavy crumb that comes from packing flour into a measuring cup.
- Baking powder (1½ tsp): This works with the melted chocolate to create the squidgy texture everyone loves.
- Fine sea salt (¼ tsp): A whisper of salt makes the chocolate taste more like itself, more alive somehow.
- Cocoa powder (50 g): Use unsweetened; the sweetness comes from the sugar and chocolate.
- Whole milk (150 ml): The milk keeps the batter from becoming too thick when you fold in the dry ingredients, helping that tender crumb develop.
- Vanilla extract (1 tsp): Just enough to add dimension without announcing itself loudly.
- Dark chocolate for icing, chopped (150 g): Use the same quality as the cake chocolate so the whole thing tastes cohesive.
- Unsalted butter for icing (100 g): Softened slightly makes beating in the icing sugar infinitely easier.
- Icing sugar, sifted (200 g): Sift it before you measure—sifting as you go creates lumps that won't incorporate smoothly.
- Whole milk for icing (3 tbsp): This prevents the icing from being too stiff and gives it that glossy, spreadable finish.
Tired of Takeout? 🥡
Get 10 meals you can make faster than delivery arrives. Seriously.
One email. No spam. Unsubscribe anytime.
Instructions
- Prepare your tins and heat your oven:
- Set the oven to 180°C (160°C fan) and line your cake tins with baking paper—butter the tins first so the paper stays put. This small step saves you from the frustration of cake sticking to parchment.
- Melt the chocolate and butter together:
- Use a heatproof bowl set over a pan of gently simmering water, not boiling—the water shouldn't touch the bottom of the bowl or the chocolate can seize and become grainy. Stir occasionally and be patient; this takes about 5 minutes but the result is silky smooth.
- Whisk the sugar and eggs until they're pale:
- This should take a good 3 to 4 minutes with an electric whisk, and you'll see the mixture go from thick and pale yellow to almost fluffy. It's the air in this step that helps the cake rise.
- Combine the chocolate mixture into the eggs:
- Stir in the cooled melted chocolate and vanilla, then gently fold so you don't deflate all that whisking you just did. The mixture will look rich and glossy.
- Sift the dry ingredients:
- Sifting the flour, baking powder, salt, and cocoa powder together ensures there are no hidden pockets of cocoa or baking powder lurking in the batter. This step genuinely makes a difference in the final texture.
- Fold everything together gently:
- Alternate adding the sifted dry mixture with splashes of milk, folding gently with a spatula until just combined—stop as soon as you don't see streaks of flour anymore. Overmixing develops gluten and makes the cake tough.
- Divide between the tins and bake:
- Pour the batter evenly into both tins and bake for 30 to 35 minutes; the cake is done when a skewer comes out with a few moist crumbs still clinging to it, not completely clean. A cake that seems slightly underbaked here will be perfect once cooled.
- Cool and turn out:
- Let the cakes rest in the tins for 10 minutes—this firms them up enough to turn out without crumbling—then flip onto a wire rack to cool completely. The cooling is important because the icing won't adhere to a warm cake.
- Make the icing:
- Melt the chocolate and butter the same way as before, then remove from heat and gradually beat in the sifted icing sugar with the milk, a spoonful at a time. Keep beating until the icing is smooth, glossy, and thick enough to spread.
- Assemble the cake:
- Place the first cake layer on a serving plate, spread a third of the icing on top, then carefully position the second layer on top. Cover the top and sides with the remaining icing, smoothing it with a palette knife for a clean finish or leaving it rustic, depending on your mood.
 Save
Save My partner once accidentally flipped a cake layer upside down when assembling, icing side down on the plate, and we both froze for a second before laughing and just going with it. The cake was still delicious, the icing spread beautifully across the now-exposed crumb, and honestly it tasted exactly the same. That's when I realized this cake doesn't need perfection to be wonderful—it just needs to exist and be chocolate.
The Magic of Melted Chocolate
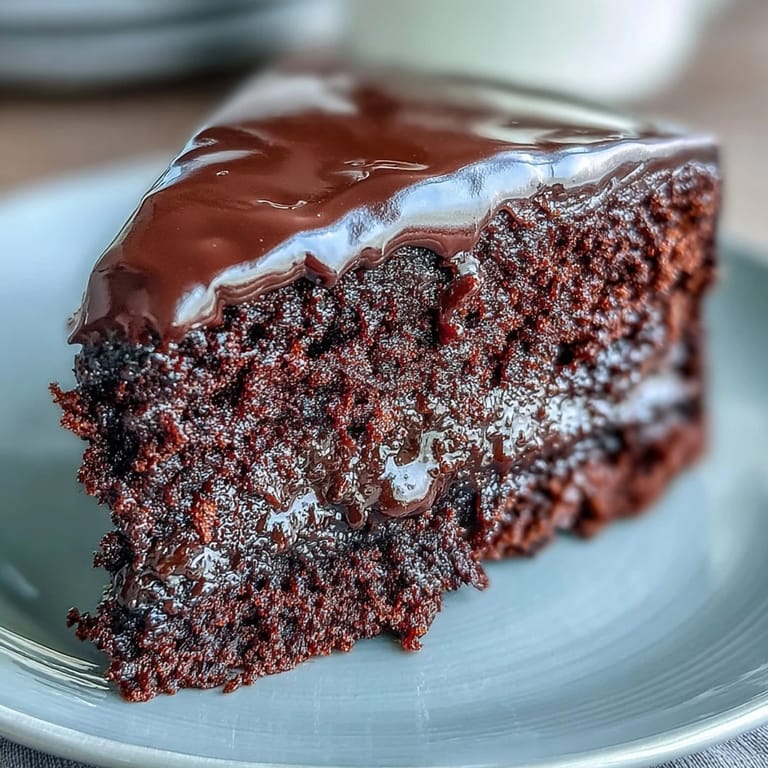
There's a reason melting chocolate and butter together at the start creates such a tender crumb—the fat from the butter coating the flour particles keeps them from developing too much gluten, which would make the cake tough and elastic instead of soft and yielding. The chocolate itself adds moisture, which is why this cake stays tender for days, getting fudgier as it sits. Understanding this changes how you think about chocolate baking; it's not just about flavor, it's about structure.
Why This Cake Stays Moist
The combination of whole milk folded in at the end and the cocoa powder throughout keeps the crumb from ever feeling dry, even when you slice it the next day. Some recipes use hot water or even coffee to amplify the chocolate flavor and keep things moist, but this straightforward approach—good chocolate, butter, milk—works just as well and tastes cleaner. The icing sealing the whole thing acts as a moisture barrier too, which is why storing it in an airtight container makes it last longer without drying out.
Variations and When to Use Them
If you want to add something special without changing what makes this cake work, try spreading a thin layer of raspberry jam between the cake layers before the icing—the tartness plays beautifully against all that chocolate. You could also crumble digestive biscuits into the icing for a subtle texture contrast, or add a teaspoon of instant espresso powder to the dry ingredients to deepen the chocolate flavor without making it taste like coffee.
- A layer of jam between cakes adds brightness without requiring any technique changes.
- Fresh berries or a dollop of whipped cream alongside each slice cuts through the richness beautifully.
- Make this cake a day ahead and let the flavors settle—it actually tastes better the next day.
 Save
Save This cake is the kind of recipe that teaches you things just by making it—about patience, about how ingredients actually work together, about knowing when to stop fussing. Make it for someone who needs chocolate or celebration or both, and you'll understand why it keeps coming back to tables again and again.
Recipe FAQ
- → Can I use milk chocolate instead of dark chocolate?
Yes, but dark chocolate with at least 50% cocoa solids provides the best rich, intense flavor and prevents the cake from being overly sweet. Milk chocolate will make it sweeter and less fudgy.
- → How do I know when the cake is done?
Insert a skewer into the center—it should come out with a few moist crumbs, not wet batter. The cake should also spring back lightly when touched and pull away slightly from the tin edges.
- → Can I make this cake ahead of time?
Absolutely. The cake keeps well in an airtight container for up to 3 days at room temperature. You can also freeze un-iced layers for up to 3 months and ice them after thawing.
- → Why is my icing too runny or too thick?
If too runny, add more sifted icing sugar gradually. If too thick, add a small amount of milk—one teaspoon at a time—until you reach the desired smooth, spreadable consistency.
- → Can I make this as a single-layer cake?
Yes, use a 23 cm (9-inch) round tin and bake for 40-45 minutes. Adjust baking time as needed and check with a skewer. You can use all the icing on top for a thick, generous layer.
- → What can I substitute for whole milk?
Semi-skimmed milk works well, though whole milk gives the best texture. For dairy-free, use unsweetened almond or oat milk, but ensure your chocolate and butter are also dairy-free alternatives.