 Save
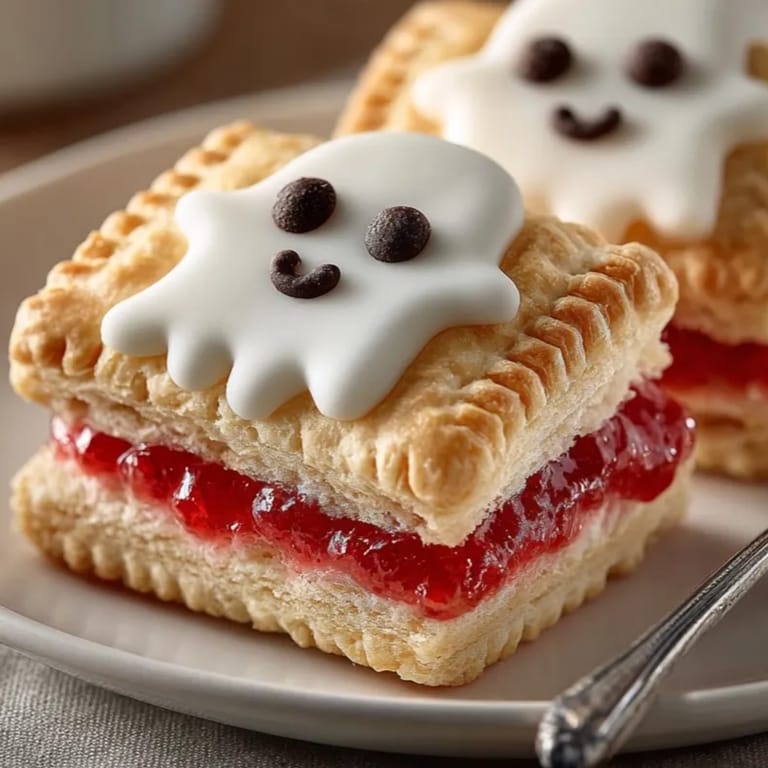
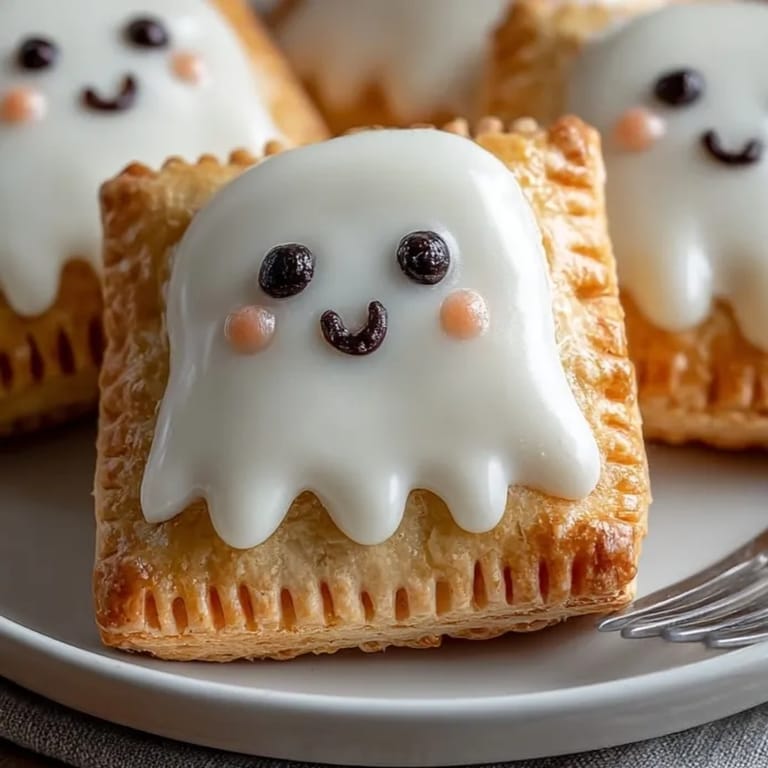
Save These playful Ghost Pop-Tarts have become the centerpiece of our Halloween breakfast tradition. Crafted from a buttery homemade pastry filled with sweet jam and decorated with ghostly faces they are guaranteed to delight kids and guests at any festive gathering.
The first year I made these my youngest spent twenty minutes arranging chocolate chip faces just so. The whole family now looks forward to ghost-making day more than pumpkin carving.
Ingredients
- All-purpose flour: ensures the pop-tarts are tender and crisp select a fresh bag without any funny odors for best results
- Granulated sugar: adds gentle sweetness choose organic or fine-grain for better blending
- Salt: highlights the buttery flavor just a pinch rounds everything out
- Unsalted cold butter: gives layers and flakiness use European-style butter for even richer taste
- Ice water: binds the dough together keep water icy cold for easy handling
- Fruit jam or preserves: bring vibrant color and flavor pick high-quality jams with real fruit for best results raspberry or apricot are crowd favorites here
- Powdered sugar: creates the smooth ghostly icing sift it for a lump-free topping
- Milk: gives icing its silky texture whole milk yields a creamier finish but any variety works
- Vanilla extract: adds aroma and depth try pure vanilla for the brightest flavor
- Mini chocolate chips or black decorating gel: create playful ghost faces use allergen-free brands for safe snacking
Tired of Takeout? 🥡
Get 10 meals you can make faster than delivery arrives. Seriously.
One email. No spam. Unsubscribe anytime.
Instructions
- Make the Pastry Dough:
- Combine flour sugar and salt in a large bowl. Add cold butter cubes and work it into the flour until you see pea-sized crumbs. This creates the flaky base the colder your butter stays the better your layers.
- Bring Dough Together:
- Drizzle ice water in one tablespoon at a time mixing gently until the dough holds together. Pat dough into two discs wrap tightly and chill for at least thirty minutes. Chilling relaxes the gluten and keeps the pastry tender.
- Prepare for Baking:
- Heat your oven to three hundred seventy five degrees Fahrenheit and line a baking sheet with parchment paper. This prevents sticking and helps bake the bottoms crisp.
- Shape the Ghosts:
- On a lightly floured surface roll out one disc to an eighth-inch thick. Use a ghost cookie cutter or a sharp knife to form sixteen ghost shapes. For even ghosts aim to cut similar sizes or trace a template.
- Fill and Assemble:
- Place eight ghosts on the baking sheet. Scoop one tablespoon jam onto the center of each ghost leaving ample border. Brush edge with water place a second ghost on top then seal and crimp edges with a fork. This traps steam for a flaky pop-tart.
- Bake Until Golden:
- Slide tray into the oven and bake for eighteen to twenty minutes until ghost edges are lightly golden. Let cool fully before icing so your decoration stays put.
- Make the Icing:
- Whisk powdered sugar milk and vanilla in a bowl until glossy and smooth. Spread icing over cooled ghosts for a true spooky effect.
- Decorate Faces:
- Dot on eyes and mouths with chocolate chips or decorating gel. Kids love crafting silly or scary faces. Wait until icing firms before stacking or serving.
 Save
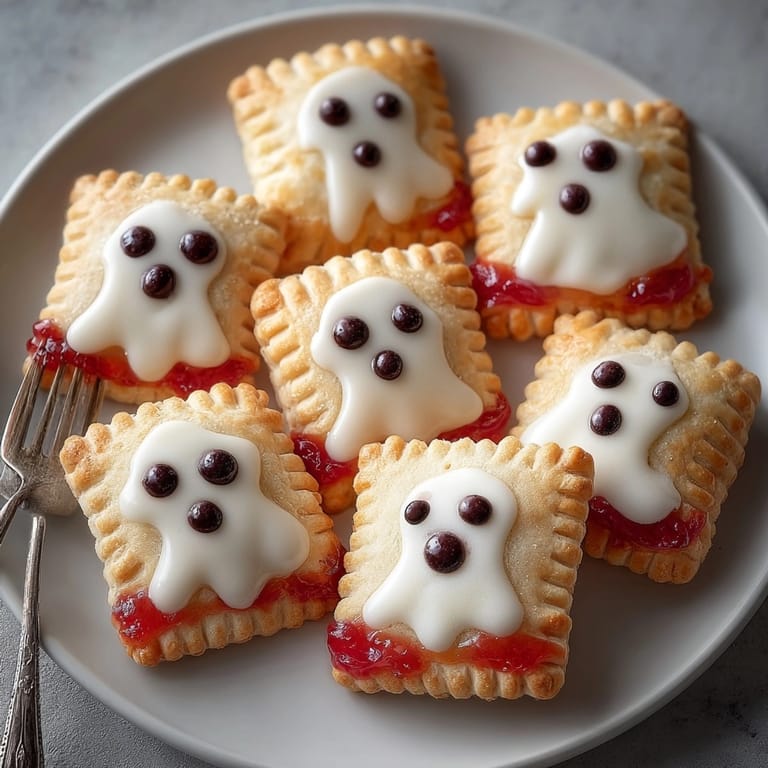
Save One year we made a dozen spooky ghosts for a sleepover and the giggles over lopsided faces were the best part. I always reach for bright tart raspberry jam so the filling pops with flavor and color.
Storage Tips
Keep finished pop-tarts in an airtight container at room temperature up to three days. They are best fresh but can be revived with a quick warm in the toaster oven. I often wrap extras for lunchbox treats or after school snacks.
Ingredient Substitutions
Try gluten free flour blends for sensitive eaters just add a pinch more ice water if dough is dry. Dairy free butter and alternative milk for the icing work fine. Swap jams for chocolate hazelnut or even apple butter for an autumn twist.
Serving Suggestions
Serve ghosts with hot chocolate apple cider or a scoop of vanilla ice cream. Line them up on a platter with edible eyes and a few candy pumpkins for the full Halloween effect. Kids love picking their own ghost from the tray.
Cultural and Historical Context
Homemade pop-tarts draw from classic American toaster strudel traditions adapted for holiday fun. Ghost shapes give a playful nod to Halloween without scary ingredients. Making them together builds family memories and traditions.
Seasonal Adaptations
Use pumpkin butter for a fall version
Decorate with heart faces for Valentine's day
Try pastel icing and bunny shapes for spring
Ghost pop-tarts are easy to make ahead for parties and freeze beautifully if iced after thawing.
Success Stories
Every Halloween these ghosts show up at breakfast and on dessert platters. One year the neighbors joined for a decorating contest and everyone loved making the tiniest ghost faces. They are now a requested treat at potlucks and bake sales.
Freezer Meal Conversion
Once baked and cooled ghost pop-tarts can be frozen up to a month. Lay them flat between sheets of parchment then pop out and ice after thawing. This lets you prep ahead for busy morning treats.
 Save
Save This recipe brings smiles to your breakfast table every time especially when you play with fun fillings. I like to stash a few in the freezer for surprise treats all season long.
Recipe FAQ
- → How can I achieve perfect ghost shapes?
Using a ghost-shaped cookie cutter ensures uniform pastries, but freehand cuts with a knife work for a playful touch.
- → What jams work best for filling?
Strawberry, raspberry, and apricot jams are ideal, but you can swap with Nutella or pumpkin butter for variety.
- → How do I prevent pastry leaks?
Brush edges with water and crimp well before baking to seal and prevent jam from escaping during baking.
- → Can I make these pastries ahead?
Yes, store pastries in an airtight container for up to three days, keeping them fresh and easy to serve.
- → Is there a vegetarian option?
This treat is vegetarian-friendly as it uses butter, jam, and other plant-based ingredients.
- → How should I decorate faces?
Mini chocolate chips or black decorating gel work best for creating charming ghostly expressions on each pastry.