 Save
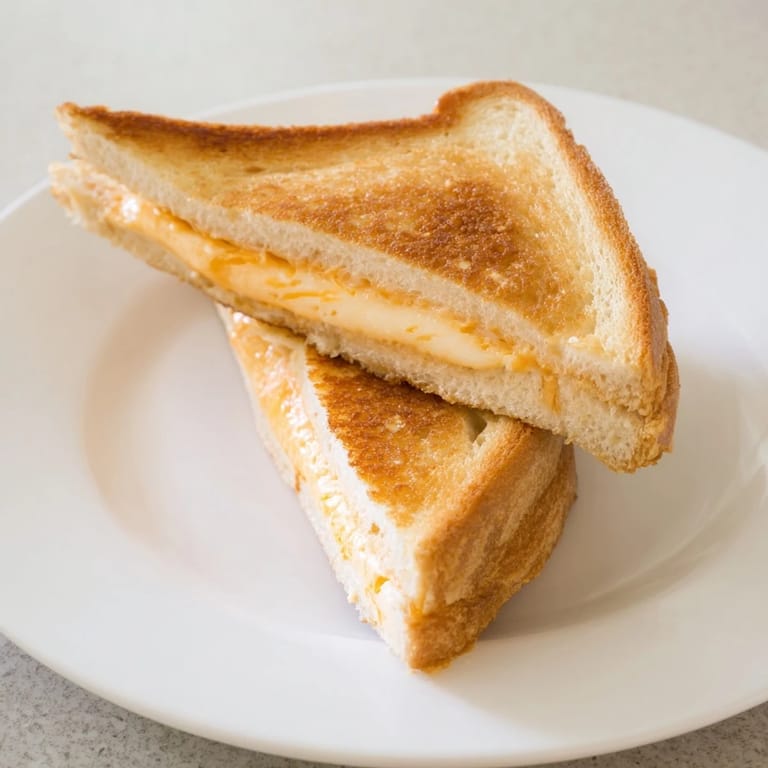
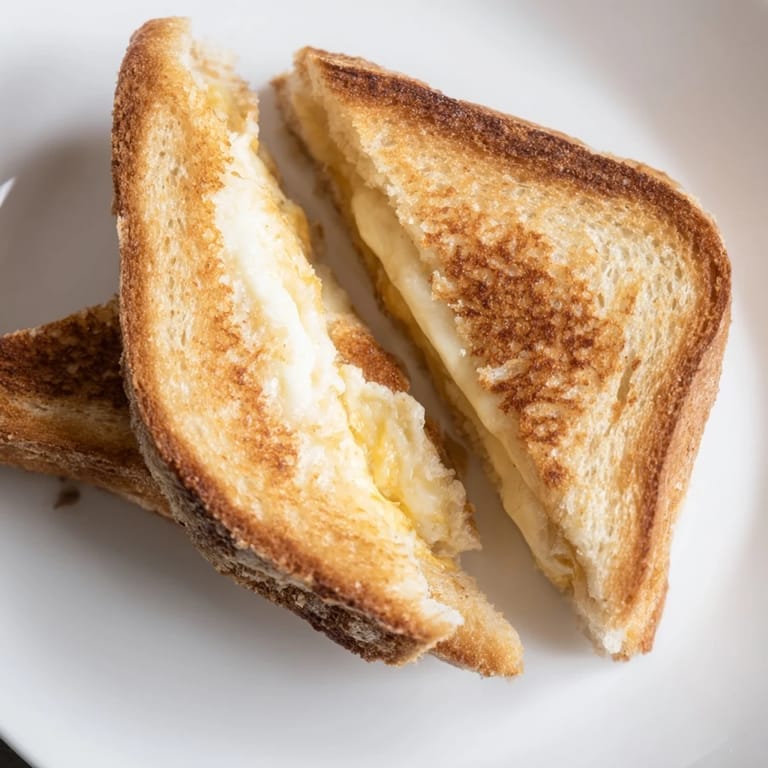
Save I discovered the mayo trick by accident on a Tuesday morning when I'd grabbed the wrong jar from the fridge, too bleary-eyed to notice my mistake until I'd already slathered it across the bread. What happened in that skillet changed everything about how I make grilled cheese—the mayo created this impossibly golden, almost caramelized crust that butter could never quite achieve, and the interior turned creamy in a way that felt almost luxurious. Now it's the only way I'll do it.
I made these for my roommate on a rainy Saturday when we were too lazy to go out, and she literally asked if I'd called a restaurant to deliver them. Her face when I told her it was just mayo and cheese—that combination of disbelief and then immediate appreciation—that's when I knew this needed to become a regular thing in our apartment.
Ingredients
- Bread: White or sourdough both work beautifully, though sourdough gives you a bit more tang and structural integrity when things get melty.
- Cheddar cheese: Sharp cheddar specifically has enough personality to hold its own against the mayo, but Monterey Jack and Gruyère are equally fantastic if you want to experiment.
- Mayonnaise: This is doing the real work here—it browns faster than butter and creates a completely different texture, almost creamy against the bread rather than crispy.
- Dijon mustard (optional): A thin smear adds this sophisticated background note that most people can't quite identify but absolutely love.
Tired of Takeout? 🥡
Get 10 meals you can make faster than delivery arrives. Seriously.
One email. No spam. Unsubscribe anytime.
Instructions
- Prep your bread:
- Lay all four slices out on your counter so you're not fumbling around when the skillet is heating. This small bit of prep work keeps you in control of the whole process.
- Spread the mayo evenly:
- Use about a teaspoon per slice, applied with a butter knife in gentle strokes—you want an even layer that's thin enough to see the bread underneath slightly. This is where the magic actually begins.
- Add mustard if you're feeling it:
- Just a whisper of Dijon on the inner-facing sides of two bread slices, applied the same way as the mayo.
- Assemble your sandwiches:
- Two slices of cheese between each pair of bread, mayo-side facing outward like bookends. Make sure everything's aligned so nothing slides around when you're flipping.
- Heat your skillet low and patient:
- Medium-low heat is non-negotiable here—too hot and you'll brown the outside while the cheese inside is still a solid block. Let the skillet warm for a minute before you add anything.
- First side in the pan:
- Mayo-side down first, and listen for that gentle sizzle. You'll know it's working when the aroma shifts from raw mayo to something toasted and inviting, usually around the 2-minute mark.
- Watch for the golden signal:
- Around 3-4 minutes, lift one corner gently with your spatula—you're looking for that rich golden brown, almost amber if you're feeling patient. It should look like something you'd order at a proper restaurant.
- The flip:
- Use your spatula to slide underneath one sandwich at a time, then flip with a little confidence. The bread should feel set enough to hold itself together at this point.
- Final side and cheese verification:
- While the second side cooks, gently press down with your spatula—not hard, just a light touch every 30 seconds or so. You can feel when the cheese is actually melted because the sandwich gives slightly under pressure instead of resisting.
- Rest and serve:
- Off heat, let them sit for exactly one minute. This lets the internal cheese set just slightly so your first bite doesn't result in molten cheese escaping everywhere.
 Save
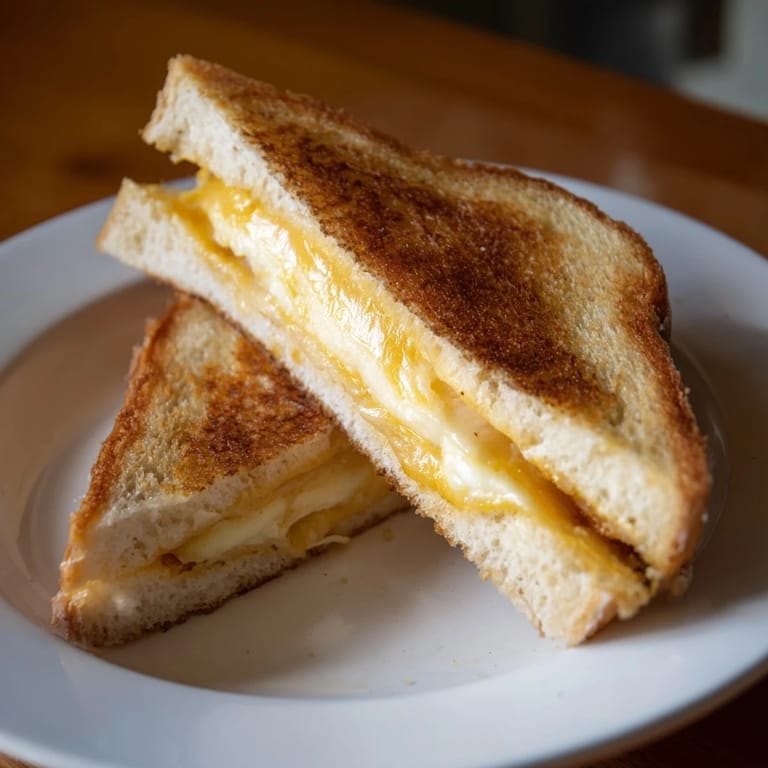
Save There's something quietly satisfying about watching someone take that first bite of a grilled cheese made this way—the way their eyes focus for a second as they register that it tastes better than expected, that the texture is somehow both crispy and creamy at the same time. That moment of surprise, that's when you know you've done something right.
Why Mayo Changes Everything
Butter has been the default for so long that most people don't even question it, but mayo operates on completely different principles. It contains water and emulsifiers that create browning reactions butter simply can't match, and because mayo sits on top of the bread rather than melting into it, you get this distinct textural boundary between the crispy exterior and the soft interior. The first time you experience this sandwich made properly, something clicks about why this method exists at all.
Cheese Selection Matters More Than You Think
Not all cheese melts the way you'd hope—some get grainy, others refuse to cooperate entirely. The best melters have a higher fat content and lower melting point, which is why sharp cheddar, Monterey Jack, Gruyère, and even good mozzarella all work beautifully. The type you choose subtly shifts the whole personality of the sandwich, from comforting and familiar to sophisticated and slightly fancy, all while taking exactly the same amount of time to cook.
Variations and Pairings
The beauty of this sandwich is that it handles additions gracefully—the crispy exterior can hold up to sliced tomatoes without getting soggy, caramelized onions add a sweet complexity that pairs incredibly with sharp cheeses, and crispy bacon brings a textural contrast that somehow works. Some people swear by pairing this with tomato soup, which makes sense on a practical level but misses the point slightly; the sandwich is honestly good enough to stand completely alone.
- Thin tomato slices placed between the cheese and bread (not on the mayo-facing sides) prevent sogginess while adding brightness.
- A single layer of crispy bacon or prosciutto transforms this from lunch into something that could convince you it's actually a more sophisticated meal.
- Experiment with bread types—rye brings earthiness, brioche brings richness, and hearty wheat brings substance that holds everything together remarkably well.
 Save
Save This sandwich reminds me why simple food done well deserves respect—no unnecessary ingredients, no complicated techniques, just the right approach to something basic that transforms it into something special. Make it once and you'll understand why I stopped using butter entirely.
Recipe FAQ
- → Why use mayonnaise instead of butter?
Mayonnaise creates a golden, crispy crust with a creamy texture that butter doesn't achieve, enhancing the sandwich's overall flavor and crunch.
- → What type of cheese works best?
Melting cheeses like cheddar, Monterey Jack, or Gruyère create a gooey interior that complements the crispy bread.
- → Can Dijon mustard be added?
Yes, a thin layer of Dijon mustard adds a subtle tang that brightens the savory flavors of the sandwich.
- → How to prevent burning during cooking?
Cook over medium-low heat while pressing gently with a spatula to ensure even browning without burning.
- → Are there suggested additions?
Try adding sliced tomatoes, caramelized onions, or crispy bacon to elevate the flavor and texture variety.